Tres Leches Cake

Delicious for any occasion

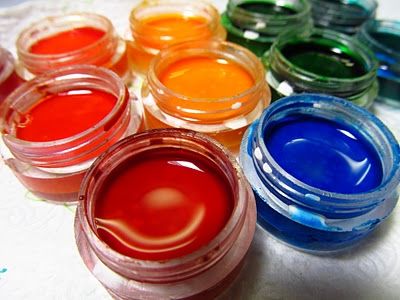
Homemade Watercolors

For homeschoolers, or just fun at home

DIY Toothpaste

Great for good health, and a happy pocketbook

Vegetarian Meals for the Whole Family

Even picky kids will love these meat-less dishes

Sewing Projects and Tips

Even more tutorials to come soon

Tuesday, August 21, 2012

Need Recipe Ideas?

recipes subscibe for recipe ideas

It happens to all of us. One week there is just no inspiration and no energy to make anything besides salad, a chicken breast, and a carton of mediocre ice cream. Those are the days when you wish you had a personal chef, or that at least the take out guy would appear. Instead of languidly flipping through your old cookbooks, why not take a quick look into your inbox at a Weekly Recipes e-mail? Our weekly newsletter is chock full of beautiful photos and delicious recipes ready to inspire you to end your cooking rut. We carefully cull the best of the web to bring only the most delicious and exciting new recipes straight to you!
Subscribe here!

Here’s an excellent recipe from Gourmet.com.  This and many more great recipes will be featured when you subscribe to Weekly Recipes!

Roasted Mushrooms Escargot-Style from Gourmet.com
Let’s be honest—the best part of escargots is the garlicky, parsley-flecked butter that the snails are cooked in. In this playful vegetarian spin, meaty mushrooms turn out to be the ideal vehicles for soaking up all that buttery goodness. Capers add a briny pop that fits right in. Serve with crusty bread to soak up all the great leftover juices.

  • 1 lb mushrooms such as cremini or white, halved lengthwise if large
  • 2 tablespoons capers, rinsed and chopped
  • 3 large garlic cloves, minced
  • 2 tablespoons vegetable oil
  • 3 tablespoons unsalted butter, cut into pieces
  • 2 teaspoons fresh lemon juice
  • 1/4 cup chopped flat-leaf parsley
Preheat oven to 450ºF with rack in middle.
Toss mushrooms with capers, garlic, oil, and 1/8 tsp each of salt and pepper in a 1 1/2- to 2-qt shallow baking dish. Top with butter and roast, stirring occasionally, until mushrooms are tender and golden, 15 to 20 minutes. Stir in lemon juice and parsley.

Author Info
Francis’ first attempt at cooking was a souffle at age 13, and she has never had one fall (yet). Ever since then she has scoured the web for new recipes and is very excited to share her huge stash of bookmarks with the world in a new e-mail newsletter.


----------------------------------------------------------------------------------------------------------------------------------------
{Thanks so much Francis! I LOVE mushrooms and I'll have to try this recipe this week! - Jenni}

Monday, August 20, 2012

Ella the Elephant is all Ears

This week The Princess and I are working on Ee, and the color grey. OF COURSE this week will involve ELEPHANTS! And, since we are also doing a lot of ear things....we needed to do some elephant ears.

How cute are little hand-print elephant ears? Super cute! First I found an elephant face clip art. I erased the ears, broadened the lines for little hands to cut, and put it in a document for printing. I printed on draft so that The Princess could paint it herself, but it is grey in the document so I could share it and those who didn't want extra drying time could still use it! Here's our quickly-done-a-little-crooked-but-preschoolers-cut-that-way-anyways elephant face. ;-)

We painted with watered-down grey paint (and by "we", I really mean "she painted while mommy sat there...)

Then we blotted with a little tissue to make it look like wrinkly elephant skin.
After it dried, she cut it out and we glued it onto some thick paper. Then we made some hand-print ears with non-watered down grey paint. (Which apparently tickles...a LOT!)
Ella the Elephant!

Friday, August 17, 2012

Little One Errand Food: Part 2

Today we're heading into the city today, and decided to make our snack box within the themes of this week's school stuff. We are working on the letter G. (The Princess is so excited that her name has a big G AND a little g!) We also worked with the color green. Today's snack box is a G/green box.

We have:
  • a fruit salad with grapes, kiwi, and green apples.
  • goldfish crackers. (OK, so they're whales here...don't tell The Princess!)
  • her favorite- green olives.
  • and a granola bar.
  • and a spiffy green sword to eat it with!

Tuesday, August 14, 2012

Make Your Own Learning Games: Color Sorting and Matching Box

Whether or not you are homeschooling, many education games will keep your little ones entertained for hours. One of ours is this color sorting and matching game. And since we've found boxes that the egg-carton base fits in, it's just gotten better ;-)

You can either start with a 1 1/2 dozen carton- cut in half, or cut down a bigger 2+ flat into a 3x3 square.

I used to keep my egg-carton games (I have more I'll be sharing...) in gallon zipper bags, but I recently discovered that they fit PERFECTLY into the Twinings' 50-count boxes. I knew I saved them for a reason!

What your egg-cartons are made of will determine what you use to paint your wells with. I used old-ish nail polish fine in these cardboard ones. But that will eat Styrofoam ones, so use plain ol' craft paint.

Randomly paint the bottoms of each well with one color. Here I have white, , pink, orange, red, yellow, purple (looks blue on here!), blue, green, and black. I've used brown before when we've had trouble finding little black items to sort.


Next, gather items to sort. If you have really small ones, be very careful in case they get into and mouth the preschooler's game!
We have pompoms, beads, bits of ribbon, little erasers, etc. We were still gathering when this picture was taken and later for black we also added a lego, a tiny tire, small checker piece. (Just to give you ideas!)

We put them in a snack-sized baggie, and it fits perfectly in the box too. You can also add for extra manipulation activities, large tweezers or a clothespin to pick up items &/or a plastic spoon for scooping.
Little ones love this game because they can "play" it however they want! Any way to meet the objective of sorting the object into their colored wells works!


Monday, August 6, 2012

How I Make My Pillowcase Dresses

There are probably 1001 ways to make pillowcase dresses, and everyone has their favorite. This is the way I make mine for several reasons:
  • -I like the way it looks.
  • -Sometimes I don't have matching ribbon or want the straps to be from the same fabric- this is adaptable for it.
  • -I can also use bias tape for the straps.
  • -The straps can be tied to fit a growing child, you're not limited to the size it's first made like the dresses that use the ribbon to gather AND become straps. (I always worry about those getting tangled around the neck as well.) So it can be worn for many years- even as a shirt much later!

(click any pic to see larger)

First, find a spiffy pillowcase. I also use rectangles of fabric that I like. Measure how long you'll want the dress, and mark. Here's a tip for active little ones- also have them bend over when you're holding the pillowcase up to them so check length. Check and be SURE the finished dress will cover little panties! Adjust as needed. I chopped off quite a bit of this case for my four-year-old.
Now, turn inside-out and fold in half. I like to do it inside-out so I can mark my line with whatever I can find. ;-) Make a mark TWO inches from the edge. (NOT the folded edge, the one where both sides meet.) Make one FOUR inches down. Connect these marks with a J-shaped line. Cut out. This arm-hole size will fit any size because you'll adjust with the ties/straps.
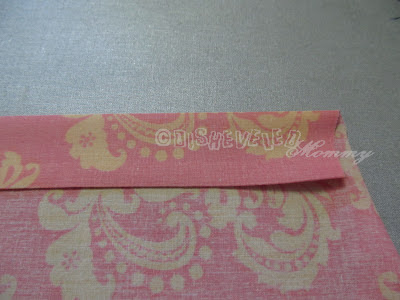
Now, we'll start to iron and hem up that top. Fold down one of the layers about 1/4 inch. Press.
Fold down about an inch (you can get away with a little less if using thinner elastic, but I like how an inch looks.) Press again.
Repeat for the other side.
Now that you have nice and tidy edges, sew the top to hold the elastic. Use the left side of your foot to keep it lined up.
This'll keep your line neat and straight. Don't forget to back-stitch a couple stitches in the beginning and the end to keep your work from coming undone. Don't mind the excess on the edges, they'll be covered in just a bit. (Let's also pretend like I used dark thread to show you the stitching...I actually ran out of everything else and wanted to finish the project!)
Next, insert and sew in some elastic (3/4 inch seems just perfect) using this method here. Six to seven inches will work fine. Just enough to make that gathered top, and cover chests. No worries if your securely attaching is a little messy, it will be covered up.
  Now- here is where you will adapt from my basic way if using thinner ribbon for ties that will need to be threaded into the arms. (My other ways finish the arm-hole edges without hemming them.) You'll want to turn in, and press a half-inch hem. Fold down about a quarter inch on the ends so they will get tucked in as you sew it into a casing. Sew each arm so that it become a tube (attached to the dress) with two open ends. Then you thread the ribbons in, about a yard each, fray-check the edges and you're done.

Using bias tape is about the same as making straps from the case's fabric, with the exception of sewing the straps together.Here is how I make my straps:

Take the extra bit you cut off, cut off one of the side (short end) seams (often there is only one!) and the top seam. Cut in half lengthwise.
 Fold lengthwise, and sew into a loooooong tube. Leave one end open for turning right-side out. I like to taper my ends like so:
I back-stitch when I turn a corner for a little extra insurance. Then I trim a bit before I turn right-side out.

You can either sew shut the open end after turning, or use a bit of stitch-witchery.
Attaching the straps is made MUCH easier if you crease/press the middle of the straps the length of the arm-holes in half. Line up the center of the strap with the center seam of the arms, folding over the rough edge of them. This is also how you'd attach bias tape straps! Sew them from top edge to top edge, and voila! (Here I used some stitch-witchery too, my thread was TOO dark for these nice finished edges, but I may go back and stitch them up as well.)
I LOVE the way the fabric straps/ties look.


Sunday, August 5, 2012

Quick Tip: Freezer Organization

Since we just have a small, above the fridge type freezer- and 5 people, I am forever working on ways to maximize our space. This also helps minimize our food budget! The key to keeping a freezer effective and efficient is organization.
One of my favorite findings is freezing items FLAT so they stack and fit nicely.
I also LOVE using baskets to keep things grouped together, AND to keep them from falling out on me.


Another tip that homemakers use for freezers of all sizes is inventorying them. I used to keep mine in my Home Binder, but it was sometimes hard to remember to cross off when I'd use something. So, I switched to posting my chart on the fridge. That seemed to work, except it fell a lot, got drawn on by little artists, was a dirt magnet, etc. Now I use an index card system. Simple to do, simple to read, and stays both handy for Mom and out of the way of grubby little snatchers.
It's super easy to meet YOUR needs. I use the following categories: beef, pork, chicken, veggies, other, desserts/juices (we hardly ever have either! lol), and ingredients/condiments/etc.

The meats are pretty self-explanatory.  I'll have some things that are cooked and portioned into family-sized servings (like ground beef), and some that are marinating. The card should tell me what's going on. Somethings are just popped into the freezer because I got them on the sell-by date and I hadn't time to fix them up. Since my charcoal steaks say nothing about them, I know I'll have to slice them up or something when I go to use them. 

"Other" has things like leftovers we like for lunches- but not the next day. Such as chili, curry, etc. Hot dogs also go here because we seldom have them, and they are often mixed meats. I have some catfish nuggets in the freezer right now, so that's there too.

Things like my cubes of tomato paste, cubes of grated ginger, and pork fat for rendering are in the "ingredients..." category. When I get butter on sale, it goes here too.

I go through a lot of "Veggies" cards. To simply it, I break some things like ears of corn into family-serving sizes. Other things I mark how much is left rather than cross the whole bag off.

It's all right there for me to make my menu plans/shopping lists with a magnetic clip. (4 for $1 in the dollar bins at Target.) Every once-in-a-while, when a card is full or too messy to read, I'll go through and re-write the unused items from it on a clean one. This week my "beef" card is nice and pretty! ;-)