Tres Leches Cake

Delicious for any occasion

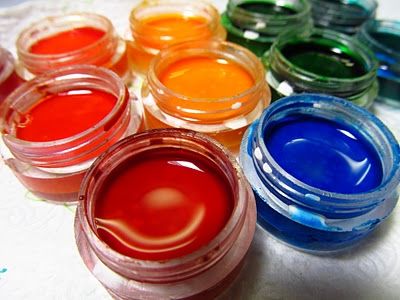
Homemade Watercolors

For homeschoolers, or just fun at home

DIY Toothpaste

Great for good health, and a happy pocketbook

Vegetarian Meals for the Whole Family

Even picky kids will love these meat-less dishes

Sewing Projects and Tips

Even more tutorials to come soon

Tuesday, December 13, 2011

Holidays on a Budget: Green and Frugal Wrappings

Sometimes being frugal also means being green. When wrapping gifts this year, why not consider these eco and budget friendly ideas?

  • Newspapers. The old stand by. Black and white pages are chic, and comics are cute. 
  • Maps. A great bonus if you use this colorful idea on a gift for someone you've traveled with. Those free maps at state welcome centers are great for this. 
  • Scarves. Look in thrift stores and sales racks for a wrapping that will give twice.
  • Tote bags. They're totally cute and fashionable now-a-days, and the recipient gets a double-gift.
  • Paper bags. Unfold and use as-is, or get creative. The paper is a great canvas for stamps, paints, or even ink drawings. 
  • Fabric. Same idea and wrapping style as the scarves, and thrift stores often have piles of it. What a cute way to wrap a gift for the crafter or seamstress in your life.

Monday, December 12, 2011

Holidays on a Budget: The Perfect Salt Dough

Salt dough ornaments are great not only from a frugal standpoint, but they are a great activity for the kids.
There are many salt dough recipes out there, but this simple one, with no "weird" stuff added works wonders. The secret to a nice, smooth dough is remembering to knead it. Just because it isn't a dough you will be eating, many people overlook this step.

Mix together:
  • 2 cups flour
  • 1 cup table salt
  • 1 cup (give or take a bit as needed) water
Knead until smooth an pliable. Cover and let sit for at least 10 minutes or until ready to use.

Roll to about 1/4th of an inch thick and cut with cookie cutters.
Bake on a parchment-lined baking sheet in a 200 degree oven (lowest setting) for a few hours or until dry. 
Paint, let dry, and glue hangers to the back.

Sunday, December 11, 2011

Holidays on a Budget: Holiday Card Holder

Here is a simple wreath for displaying your holiday cards. You only need a few items to make it, and it makes a great busy project for an older kid.

Begin with cutting an eleven-inch circle from some sturdy cardboard. You will also need a five-inch hole out of the center.
 

Next, cover this in some wrapping paper. Be sure to cut slits or notches in around the edges of the paper so it will cover the curves nicely.

Next, you can paint your clothespins, or cover them with the same paper. A coordinating paper would be nice too. To cover the pins cleanly, apply your glue, and press to the backside of your paper. You'll want to use a piece of paper bigger than your clothespins, and let them dry thoroughly before trimming the paper down. You can also coat with some Modge-Podge or similar coating for protection.
 Arrange your 12 clothespins around your wreath. Secure with hot glue. You can also add some ribbon to the center to make it more wreath-like. (We did...) By the time your pins are filled with cards around the outer edge, the ribbon in the middle will be a nice touch.

Saturday, December 10, 2011

Holidays on a Budget: Bauble Snow-Globes (Anthro-Inspired)

Silver-filled artsy snow-globes are all the rage this year. Simple but blingy, and can be used year-round. Ours don't feature jewelry, but instead good-quality silver spray paint gives trinkets a quirky touch.

First, you'll want to find a jar to use, size and shape is completely up to you. Just be sure to wash thoroughly and remove all traces of label. Don't forget the lid! I also spray painted the inside of the lid- but it was a waste of time, you cannot see it!

Gather your goodies. I saw some globes that had a bit of lace in them, so cute! I sprayed my lace with some clear coat to keep it stiff and in place under the water.I also used some mini-balls, a painted marble, a painted chess piece, and some painted twigs.
Start arranging your baubles on the inside of your lid. I used hot glue. Be sure to secure the bottoms and the tops of your balls so they stay in place when you add them to the jar. Especially the ones you "hang" from the twigs.

Fill your jar almost all the way with water, add a couple drops of glycerine, (optional, but it is supposed to make your glitter float better...) and your glitter of choice. Carefully lower your goodie-covered lid onto the jar. Glue with a waterproof glue before you screw it all the way on. Let cure. (I used a Goop-brand glue)

They even look cute upside down!
You can also cover the lid with some ribbon, it looks super-cute!
One thing is for sure, I need practice photographing them, but they are beautiful in real-life!

Friday, December 9, 2011

Holidays on a Budget: Saltine Toffee

Here is another simple candy to share this Holiday Season.

Only 4 simple ingredients And you can find them all in your pantry, or on hand.

You will need:
  • a little more than 1 sleeve of saltine crackers
  • 1 and 1/2 sticks of butter
  • 1 and 1/2 cups of packed brown sugar
  • 1 package chocolate chips
Line a half-sheet pan with foil and non-stick spray. I also like to add parchment paper, but I keep the foil to protect the sides of the pan. I just got a shiny new pan. I'd like it to stay that way. ;-)

Preheat your oven to 350.

Lay out your crackers.
In a medium saucepan over medium heat, melt together the butter and the brown sugar. Let come to a boil.
Pour over your crackers and smooth out with a spatula.
Bake for 5-7 minutes until the whole thing is bubbling like crazy throughout.

Remove from the oven and let sit for about a minute. Sprinkle with the chips and let sit for another minute.

Spread with an offset spatula.


Chill in your fridge for about 45 minutes or until set. Break into chunks.

Thursday, December 8, 2011

Holidays on a Budget: No Fail "Fudge"

This is seriously the EASIEST candy recipe you will ever see. So tasty, and perfect for a choco-craving or a holiday gift.I like to toss a few pieces in my cookie tin gifts.

You will need
  • 1 bag semi-sweet chocolate chips
  • 1 can sweetened condensed milk (not evaporated milk!)
  • splash of vanilla
  • 4 Tablespoons butter
  • any mix-ins you wish (Nuts, marshmallows, fruits, etc...)
Grease a square glass pan. Have all your ingredients ready. I like to have my butter chopped in little teeny-tiny cubes. I even dump the vanilla with it so it is ready to toss in.

In a double boiler or very carefully in a microwave, melt together the chips and the milk.

Stir in the vanilla, and the bits of butter.

Quickly fold in your mix-ins: I like WELL DRAINED halved maraschino cherries, marshmallows, and chopped almonds- Rocky Road! (What I have pictured is pecans, so my little nut-sensitive one can have some. She doesn't react to pecans =-)

Spread out into your prepared pan, chill until set, and EAT!

Wednesday, December 7, 2011

Holidays on a Budget: Christmas Popcorn Balls

These are an easy, but cheery treat for the Holidays.


Take 1 cup of light corn syrup and 1/2 cup of sugar, bring to hard boil. Add to this 1 small (3 oz.) box of dry Jello powder, in any flavor that is red. Mix very well. Pour over 5 quarts of popped pop corn. This mixture will be VERY VERY HOT. Let cool slightly. After greasing your hands, form balls the size you like, then wrap each one in saran wrap to keep fresh and soft.


Try experimenting with different colors...make some red and green ones...make some blue-raspberry ones for Hanukkah...the possibilities are endless- and yummy!

Tuesday, December 6, 2011

Holidays on a Budget: DIY Plastic Wreaths

Looking for an easy, but time consuming craft to keep the kids busy? Or maybe just one that's durable? Then grab a wire clothes hanger, a couple of white trash bags and some scissors.

Bend (or is it unbend?) your hanger into a circle. Some people like to leave the hook on for hanging, but I clip that sucker off. I also covered the part where I twisted it back together with a little tape so no one would get scratched. I also totally forgot to take a picture of this.

Next, fold your trash bag(s) in half lengthwise until you have a controllable width to cut. Cut into inch-ish sections.
That paint in my thumbnail will just NOT go away!


Then, cut each strip into pieces about six inches long. (I got 8 with each strip.)
Now we'll tie our strips to our wire form. A billion hitch knots... I believe this one is called a Cow Hitch. I'm not sure exactly what words can describe this best, so yay pictures!
Make a U shape, lay under the wire. (You can do this holding it, but I can't hold it and take pictures.)
 Bring your tails up over the wire, and through the loop.
Pull taught, and repeat. Fill your form.
Add some decorations, (yay hot glue!) and you're done. Simple for all your kiddos to do, but will keep them ridiculously busy all afternoon. Lovely.
I'm thinking about trying it with a green cheapy vinyl tablecloth for a green one!

Monday, December 5, 2011

Holidays on a Budget: Two Easy Bows

Here are my two go-to bows for decorating everything from hair accessories, to wreaths, to just for hanging on the wall.

First, grab some ribbon, wired or unwired (but wired is easier for your first few...), about 4 times as long as you wish your bow to be. Fold it into fourths to mark  or you can eyeball it, and trim the ends up later. Lay your ribbon top-side-down, there should be 3 marks, splitting your ribbon in fourths. Fold the two on the ends to the middle. Glue with a tiny amount of glue. Tacky glue, or if you're very light handed, a glue gun works best.

 When you turn it over, it should look like this...

Flip it back over and adjust your tails.

Holding your bow lengthwise, fold the edges to meet in the center-back. 

Then back forward, gathering the center. Pinch and sparingly glue in place. 
 Take a couple inches of your ribbon and fold the edges in to meet in the middle.
 Use this to cover the center of the bow. (Propping up on your glue gun is optional...)

To make an easy double bow, grab some ribbon, and fold into thirds- but not evenly. The top bow will be the smallest, using the ribbon in the middle, then a bigger bow an inch or so bigger, then the ends will be about the same as the first bow. I'm sure there is some sort of math for figuring out how much ribbon you'll need for what size bow, but this isn't the place to go if you want math. I just eyeball it.

Repeat the fold-to-the-middle like with the bow above, but repeat!

 Pinch and wrap the middle, puff your bow, and there you go!

Sunday, December 4, 2011

Holidays on a Budget: Children's Clay Menorah

Your children will love this craft project. They get to play with dough, and have their own little menorah that uses inexpensive birthday candles.

First, you'll want to make some salt dough. (Equal part salt and flour, slowly add boiling water until it is the right consistency. Knead until smooth.) We knew ours was going to be blue, so we tinted our dough so we wouldn't have to use as many coats of paint. Totally optional.

Grab a half-mommy-sized handful, or a kiddo-sized handful of dough. Tear off about a thumb-sized piece and roll into a smooth ball. Press your ball into a stone-like shape. Set aside.

Take the rest of your dough and roll into a smooth snake, about six to eight inches long. We rounded our edges.
Carefully attach your stone shape to the middle. Then start laying out your holes. We started with the middle, then evenly spaced them working our way out. I marked the holes with a skewer, then widened them perfectly with a candle. (One in the center for the shamash, and four on each side.)


Let dry several days. We tried speeding it up with a low oven, but these pieces are so thick that they crack a little, use discretion.

Paint your little menorahs, and enjoy! I thought they looked a little like stone, very nice!

Saturday, December 3, 2011

Holidays on a Budget: Cinnamon Votives

I think I may be a little cinnamon-crazy this year. =-)


I've seen all sorts of stick-covered vases around the blog-world lately. Also little twig-covered votive holders. SO CUTE. But why not do that with cinnamon sticks? They're cheap if you grab a bag from the right section in the store. I got mine from the section with Mexican foods & spices, Tampico brand, but there are many brands. They were almost a dollar each, not too shabby. I grabbed two, but then I decided to cut my sticks in half so they'd lay flatter and release a lot of scent. So I ended up using one bag. Hmmmm...what to do with the other? (Cocoa?)

I gathered my supplies first so I wouldn't be running around with the hot glue gun plugged in. I had an audience, I didn't want curious hands to be tempted.
First, I trimmed the sticks to the right height with a small serrated knife. Hold firmly with your thumb, those suckers want to splinter. Save your splinters and ends to fill in any gaps.

I found the best way to halve the sticks was to slowly stab and prod down the length of them. On a magazine to protect your table, of course....


You don't have to halve them, but I liked the way they fitted. Plus it made my kitchen smell fantastic....

Start gluing and placing...

Oh no, a gap....

Gap?


If you get a little extra hanging on the bottom....or leave a lot to take a picture to show extra hanging on the bottom.... kitchen shears make easy work of trimming it.

Add a little ribbon, and clean up the extra glue....

Oops! missed some glue!