Tres Leches Cake

Delicious for any occasion

Homemade Watercolors

For homeschoolers, or just fun at home

DIY Toothpaste

Great for good health, and a happy pocketbook

Vegetarian Meals for the Whole Family

Even picky kids will love these meat-less dishes

Sewing Projects and Tips

Even more tutorials to come soon

Monday, August 4, 2014

Meatless Monday: Three Sisters Stuffed Chiles

Three Sisters, the harmonious growing and eating of delicious corn, beans, and squash. It has developed into quite a lot of culinary applications, and at out house is loved stuffed into various foodstuffs. A favorite, green chiles. The three items compliment and complete each other, and taste amazing together.

You can use what ever type of beans and squash you like or have on hand, it's pretty versatile.

Begin with your chiles. (You can also use peppers if you wish!) You can slice in half lengthwise to fill, or cut off the stem end to fill. I go the stem end route.

After you have your chiles/peppers ready to go, lightly saute about a half-cup of diced onions in 2 tablespoons of butter. (Seems like a lot, but it won't be later...)

 While you do that, dice your squash. You'll want it at about 1/4 inch. We used zucchini here, because that's what looked good at the grocer this week. It was a medium sized squash that gave us about a cup diced.

When your onion is ready, turn off the heat, add your squash and stir. It will use up the rest of the butter and sliiiiiightly cook.

In a bowl, combine one cup of frozen or fresh corn, and a cup and a half of beans. (Canned or home-cooked...) We used black beans here. Mix in your onion/zucchini mixture. Add to that a tablespoon of lime juice, a teaspoon of cumin, and salt to taste. I also added a half-cup of shredded cheese to help slightly bind it. This will still be a very loose stuffing.

Begin stuffing into your chiles/peppers. If you are using the chiles and stuffing from the top, make the first couple spoonfuls very loose, and kind of wiggle the goodies down to the pointed end. If halved, you'll just need to spoon it on. Arrange in a pan and preheat your oven to 400.

Bake for about 20-25 minutes, sprinkle with more cheese if desired, and let it go another 15 minutes or so.

We like to serve them with tortillas to help get the lose filling and cheesiness to our mouths.


Friday, April 18, 2014

Some Great Deals This Week

I love it when I get a great deal without the hassle of coupons. (Although it IS a hassle well worth it!)

Just this week at Target, there were several brands offering a $5.00 Target gift-card when you bought three of the participating products. (& you could mix & match!) So, with a little planning, to ring up each deal separately so I could use the gift-cards right away, the cost I figured for my products was really good.

First up, Suave dry shampoos were only $2.99. Three of those is 8.97, but subtract the $5 I got back at a gift card & they were less than $1.33 each!

Then I mixed up the second batch, a lotion my son loves, but still has back-up (thank you couponing.) and a couple more for us to try out. (Someone always ends up using them...) The Vaseline lotion (Son's favorite) was $2.99, as was the Moroccan Infusion Suave lotion, and the other Suave lotion was $2.59. That made my pre-deal price $8.57. Minus the $5 gift-card earned, a great $1.19 each!


Now, I also had a great score with coupons. I luckily had some promotional coupons for $4 off two bags of Starbucks coffee. I wasn't very big on Starbucks because of the price, so I was hunting for deals after receiving some very tasty coffee from them through Bzzagent. This deal just fell in our laps, my friend saw it while we were walking by an endcap at Dillons. She always finds the greatest things, that's why I share my coupons with her!
Yes, that is SIX delicious bags of Starbucks coffee. Total retail cost (at this store) is $56.94! They were already on sale for $6.99 each... so the total of $41.94 is still pretty good. They ALSO had a deal that you'd get $3.00 off if you bought three. So, of course I had to buy six. $35.94 is still a great price, but I also pulled out 3 of my $4.00/2 coupons. (all I had left after giving some away) So my grand total was $23.94. Or a whopping $3.99 each! Far less than half of retail!

Thursday, March 13, 2014

Another Great Score at Dollar General

Popped into Dollar General today to grab a few things and of course I had to scan the clearance areas. My waiting patiently for the Valentines goods to go from 75% to 90% off paid out and I grabbed a few boxes of Valentines for school next year....and the year after, for a whopping $.10 each. They never dipped that low last year, but I was hopeful because the new management this year has been GREAT with sales and clearances.

BUT, on the other side of the store is where I really lucked out. Our store still had some bath & body gift sets left from Christmas, that up until now were just sitting on the shelves. Already at $10 each, for $12-16 worth of product, it is sometimes a good deal if you're just looking for a little discount. However today, when I passed them they had a clearance sign up! 75% off! I knew these would be gone TODAY, so I grabbed a few I know that our house would use, or that I could put up for gifts- while still not going overboard and breaking out of this months tiny budget.
For $3.00 each I got:

  • Two Suave Moroccan Infusion collections with products I've been eyeing lately. They each have a 12.6 oz Shine Shampoo, conditioner, an 8 oz deep conditioning mask, and a 3 oz shine styling oil. PLUS- a coupon for $1.00 off the skin care items of this line! 
  • Two Old Spice"Action Pack"s. They each have 1 18 oz body wash, 1 sample-size (1.7 oz) of another scent of body wash, 1 full-size deodorant, 1 trial-sized deodorant (same scent as the trial wash), and one full-sized (4oz) body spray. This one also had a coupon. 
  • One Dove set with a 24 oz deep moisture body wash, a 12 oz shampoo, a beauty bar, and a little body-poof. No coupon, but that body wash is HUGE. 
I also grabbed a little make-up kit for The Princess for $1.50, and a Calgon set that I don't know what I'm doing with yet. It has a body wash (4 oz), a little 2 oz body spray, a poofy and 3.5 oz of bath salts for $1.50 Not too shabby. 

SO, it may totally be worth checking out if your local Dollar General has these items on clearance. Quickly, before they're all snagged up! 

Friday, February 28, 2014

Great Luck and Big Coupon Savings at Target

My friend and I just went into "The City" to do some couponing. Living in a rural area, we get a little limited in what we can do with our coupons in town. Our little grocer is just like many small grocers, and they do not accept printed coupons- which, sadly, is what most really good coupons seem to be lately. So, off we went, with a plan, a prayer, and printed coupons.

While perusing the make up aisles of WalMart looking for deals, we came across some tear pads for Maybelline. Good for $2.00 off any two Maybelline products, they could come in handy some day, so we grabbed a few. We got our items, and went on to the next store, Target.


At Target we REALLY lucked out. Among the items on the shelves (not even IN the clearance section!) were some items ON CLEARANCE and for a GREAT price. Like, we would have totally snagged some of them up JUST on clearance price. But things only got better from there, because we had our $2.00 coupons!
Here are the items I got- at their retail price:

  • Dream Nude Airfoam Foundation- $8.59- I got two of these.
  • Color Show Nail Lacquer- $2.99
  • SuperStay 14 Hour Lipstick- $6.99
  • SuperStay 24 Hour lip products- $7.99- I got two of these as well. 
My total retail price for these six items would have been $43.14. Wow...

But here's what they were marked down to:
  • Dream Nude Airfoam Foundation- $2.57 each
  • Color Show Nail Lacquer- $0.88
  • SuperStay 14 Hour Lipstick- $2.08
  • SuperStay 24 Hour lip products- $2.38 each
That's already only $12.86! Then with three of our newly-found coupons I paid a whopping $6.86+tax!


Saturday, February 22, 2014

To Market To Market- It's About Thyme!

Here's the second installation of my To Market To Market tries/reviews. The first can be found here. I really did a lot with this packet of It's About Thyme!, I made a cheese spread as suggested, and so much more.


I made the cheese ball recipe, scaled down to a household size of course, and it was delicious. Fair warning, this blend is QUITE garlicky, even after mellowing in the fridge for a bit. HOWEVER, they do give a recipe for a softer-flavored mix on the pack as well. We love garlic, so we went with the stronger one and it was soooo good!

I had all the ingredients on hand, but not everyone has Feta cheese at all times. We make a lot of Mediterranean salads. We just mixed together:

It was super simple, and although it calls for whipping it up in a food processor, I just did it by hand and everything mixed smoothly. (Warm Feta still smooshes into the mixture well.) Then we just let it sit, covered, in the fridge for a few hours. (The directions say at least 3 hours, but we also ate some after being in there overnight.)

I also made a bit of the herb-butter listed on the pack, SO easy to just add the blend to taste in some softened butter. I served it with some warm, fresh rolls and it got promptly gobbled right up. 

I also tried it as a seasoning, rather than in a recipe. I had made some Broccoli-Kale Chowder that it was delicious in, as well as just sprinkling it on some baked chicken. 

Although this blend makes a wonderful cheese ball/spread and a fantastic herb-butter,  it is its versatility that really makes it shine. What other products can you find that are so adaptable? 

You can find To Market To Market online, and on Facebook if you'd like to find out more, or check out other products. 

Disclaimer:
I did receive product to try and talk about, but I did not receive ANY other compensation. I also was not told, or suggested to, what to say and ALL opinions are MY own. 

Wednesday, February 19, 2014

To Market To Market- Popeye's Passion

I was recently lucky enough to get to try a couple things from To Market To Market, and couldn't wait to share them with you! I'm going to split my post into two, so each item can get its own time to shine. (Edit to add, the second post can be found here.)

So, today's yummy yummy treat was Popeye's Passion. Upon reading the back of the pack, I saw it made FOUR cups of dip, enough for a party. But, seeing as I'm not one to party, I decided to pare it down a bit. I also wanted to take this opportunity to healthy-up the dip. VERY easy to do when it's a mix, so much better than buying a dip from the store you have no control over its ingredients.

The suggested recipe on Popeye's Passion calls for 1 1/2 cups of sour cream, and 1 1/2 cups of mayo. I decided to go with plain yogurt as my base. It covers all that's needed to replace the sour cream and mayo, tang, creaminess, and dippability. (I'm gonna make that a word, ok?)

Since the pack said it makes 4 cups of dip with that 3 cups of base and the pack, I figured 1/3 of the pack and 1 cup of yogurt would make a nice, manageable amount for my un-party. I made sure to empty the pack into a jar and shook it VERY VERY well, to keep the ingredients evenly mixed. I didn't want to mess up the ratio of the recipe. I used an old yeast jar that I save for things like spices and stuff that come in packs. The amber-colored glass helps keep light out, and they close quite tightly to keep things fresher, longer.

Mixed together, and let sit covered in the fridge for 3 hours (at least) as suggested.

Wow, it came out AMAZING. To be honest, I wasn't expecting the spinach to be enough, I am a big spinach lover... but the yogurt re-hydrated it, and there was plenty. 

There is also bit of other veggies in there, looks like some carrots maybe, and they gave it a great flavor. It was also well seasoned. None of the overly-salty, or almost chemical-ish flavor a lot of packages dips and seasonings have. I used mine for vegetables, but it would be great on almost anything. I think I'm going to get some pita chips for the next batch. I might even experiment some with additions, make it my own. 

You can find To Market To Market online, and on Facebook if you'd like to find out more, or check out other products. 

Disclaimer:
I did receive product to try and talk about, but I did not receive ANY other compensation. I also was not told, or suggested to, what to say and ALL opinions are MY own. 

Thursday, February 6, 2014

Chia & Protein Pudding

I've been trying to incorporate lots of protein into my daily diet, both to facilitate weight loss and because it is sometimes an area I am lacking. A lot of times I will use non-animal sources because that's what I prefer, or a whey-based protein powder. (Like Plexus 96!)

This pudding contains a protein powder, and chia seeds, both widely used by people looking to lose weight, or just eat healthier options. It is also VERY easy!

You will need:

  • 1 cup of either almond milk, or coconut milk. I LOVE to use dark-chocolate almond milk, so yummy!
  • 1 serving of your preferred protein powder. I love that Plexus 96 ALSO has many vitamins and minerals. 
  • 3-4 tablespoons of chia seeds. More for a thicker pudding, even less (like 2 tablespoons...) and you can make it a smoothie-type drink that satisfies. 
Put all ingredients in a blender, and blend. 


Pour into your desired container (or 2, I like to make 2 smaller snack-servings!) and chill in the fridge to set-up at least 4 hours, but over night works best.


Enjoy!


*disclaimer... YES, the Plexus 96 link IS to my Ambassador page, but I was not asked to, or compensated for this post. It is just a preferred, and yummy new protein powder I wanted to share! :) 

Monday, February 3, 2014

EASY Cake Batter Cookie Bars

Cookie bars are an easy way to throw together a quick dessert, and by starting with a cake mix- they are just that much easier!


You will need:

  • One box of white cake mix, OR the yellow mix that TASTES LIKE THE WHITE, not a butter cake mix
  • 5 TB melted butter
  • 2 beaten eggs
  • A jar of sprinkles. One of those 2.5-3oz ones
Mix together the first 3 ingredients. Mix in about 3/4ths of the sprinkles. Wow, so tiring. ;)
Spread the mix into a 9x13 pan, sprinkle on those remaining sprinkles. Bake at 350 for about 15-20 minutes. Cool in the baking pan, then cut into preferred-size bars.
Enjoy!
My five-year-old loves these, and can pretty much make them by herself! (Except for the hot oven part of course!)

Wednesday, January 22, 2014

GREAT Find at Dollar General- HUGE Clearance Sale Going On!

Today a friend & I stopped in at Dollar General and found out they were having a heck of a clearance sale. .25 for Christmas items! We got TONS of Christmas decorations fro next year...wreaths, ornaments, poinsettia arrangements... EVERYTHING was a quarter! Even the gifts that were in Christmas packaging were a quarter. I've never seen a sale like this. I picked up a couple "remote caddies", I had stolen ours for my make up brushes-ha! Right now one of the new ones is sitting on our dining room table as a silverware/napkin caddy.
They also had all Christmas baking supplies on clearance for a quarter as well. Even the spices that they only carry at Christmas...no where close to expiring! We picked up plenty of rubbed sage, ginger, nutmeg, etc for .25... about a $3.00 savings around here...per jar! Sprinkles, cake mixes, candies, and frostings were the same. We really wished we had some coupons, we'd have made it out of there with free items!

Dollar General really knows how to have a clearance sale! Check and see if your local store still has some left! 


Saturday, January 11, 2014

Sugar-Free Chocolate Candies

I saw a GREAT post over at Suzie Homemaker's Facebook page for a diet/sugar-free chocolate candy to bust your sweet tooth. We used to occasionally get the sugar-free chocolates because Mr. Disheveled is diabetic, and I am always dieting. BUT- I didn't like that they were made with sucralose (Splenda). Because of the um-tummy troubles- it gives, and because I try to avoid chemical sweeteners (and ingredients in general.) These have stevia, a natural sweetener, and also coconut oil, which we've been adding to our diet for The Princess' eczema and overall health reasons. Win. (It is also NO COOK!)

I made a couple changes to the original, because The Princess is allergic to peanuts, and I wanted to use my dark chocolate cocoa powder. (I've been putting it in everything- YUM!)

It is really quite simple too.
Mix together in a bowl:

  • 1/4 cup almond meal (I couldn't make a drive to the city, so I omitted, plus my almond butter is "dryer" than PB)
  • 1/4 cup peanut butter (We used almond butter!)
  • 1/4 cup coconut oil
  • 1/4 cup cocoa powder
  • 2 packets of stevia 

You can then drop into candy molds (or silicon ice mold like we did.) 
Let harden in the fridge (or freezer if in a hurry, )
Pop out and enjoy. Remember to keep in the fridge or keep cool because they melt very quickly! 

Friday, January 10, 2014

Influenster Violet VoxBox

Between Winter Break and major life changes in the Disheveled house, I'm a little behind on some things. Blogging being one of them, and by default- reviewing my awesome "VoxBox" sent to me by the good people at Influenster.

So, without further delay, the good (very good!), the bad (unfortunately), and the ugly (my neglected cuticles.)


Let's start with the bad. Let's get it out of the way. Soyjoy. I am very disappointed in you. The picture on the wrapper looked tasty, the brand Soyjoy proudly displayed, promising me a quick and yummy mommy-breakfast on one of our busiest days. 

One of these things was not like the other. & it was VERY dry (I even dipped it in my coffee!) and very not-dark-cherry-chocolate flavored. At least I had my coffee. & the rest of the VoxBox.

The rest of the products were pretty straight-forward and met my expectations.

The mask from Montagne Jeuness was weird at first, I'd never used a clay mask that was A MASK before. The fabric to it was sturdy, but easy to apply. It smelled heavenly. Fruity, but not sweet- like real fruit even. It left my face soft and didn't break me out. I can't seem to find the pictures of the mask, but that's probably better for you ;)

Some of the boxes got a Goody Quickstyle brush, and some a Goody Athletique Headband. I received the headband. In grey! Perfect! Not much to show, but I can tell you it was super comfy, slipped very little, and the adjustable feature was something I didn't know I needed. It whisked away sweat, even while bouncing away on the wii Fit, and didn't get moist and stinky itself.

I also received the Not Your Mother's Clean Freak Refreshing Dry Shampoo. Which is a mouthful. But not a handful. Even though I'd never used a dry shampoo before (which is weird b/c I am a no/low poo-er, right!?) I found it very easy to use, didn't seem dusty or overly powdery at all. The really-gotta-brush-the-hell-outta-it-or-you'll-be-grey feature of dry shampoos is why I hadn't tried them before. I am very glad this one left me with a good impression. Plus it smells great! Not really there....but clean.

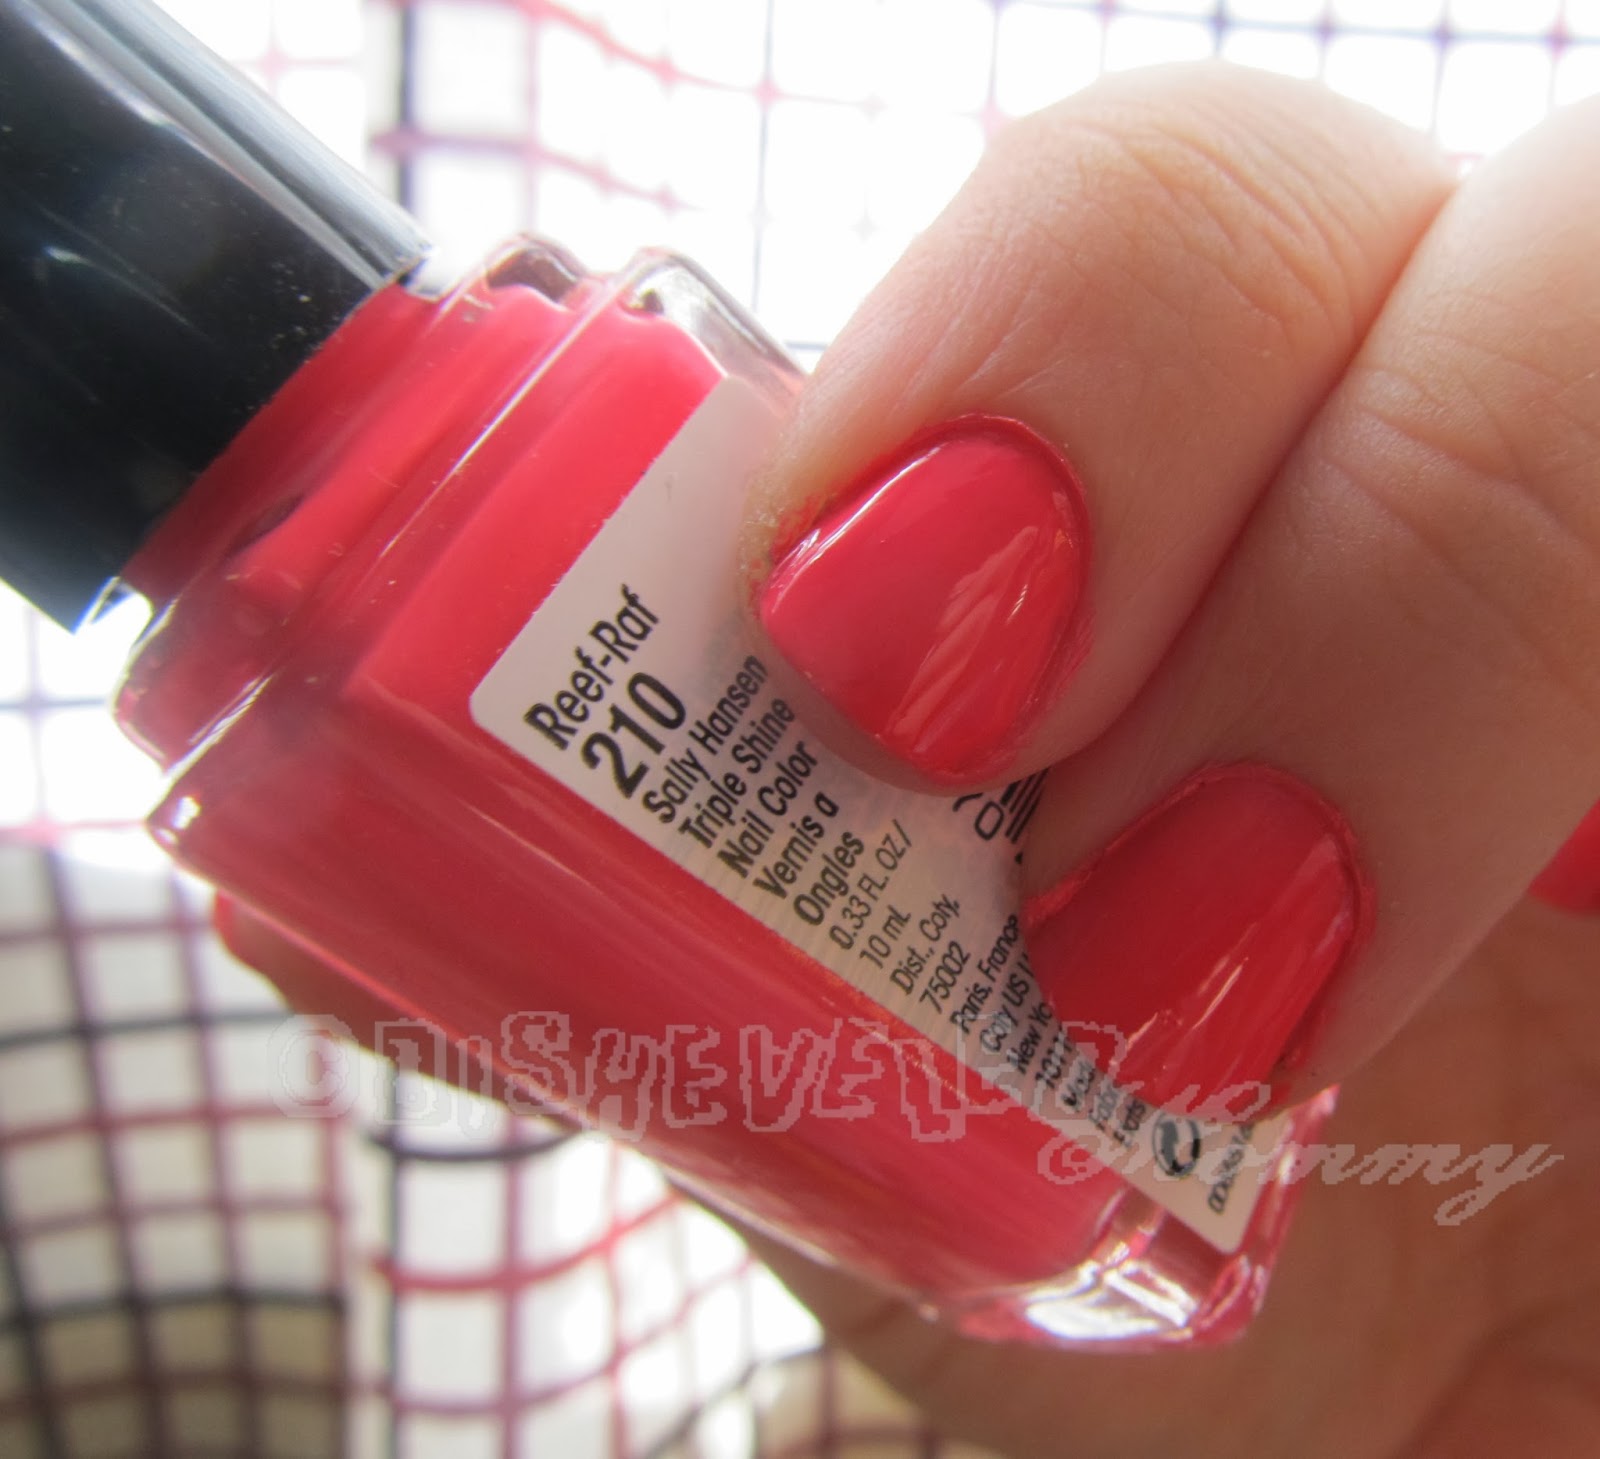
And finally, the Sally Hansen Triple Shine polish. It took me foreeeever to get a chance to try it, kids and all. And when I finally did I didn't get to sit down and do the whole pampering thing, so excuse my HORRIBLE cuticle care. It is temporary, I promise.

But on the bright side, the polish was thick and smooth enough to apply quickly given my lack of time. Just a couple coats and I was done. I didn't even to a white base-coat like I usually do with bright colors, it just popped on its own! It may be weird, but I do have to say I really liked the brush on this product. It was a touch bit wider than normal, the teensiest bit tapered. (Even if my spell-check is yelling at me that teensiest isn't a word- whatever...) and a bit flat. It applied beautifully. I may just go and buy all the colors because I love the feel of the brush so much!


So, a quick reminder/disclaimer:
Yes, I was sent the VoxBox for fun & review, but all the opinions are strictly mine and mine alone. (Sorry SoyJoy :( ) I received no payment for my participation in the program, other than the products themselves.

Monday, January 6, 2014

Roasters Are for More Than Thanksgiving (Pt.1?)

Chicken quarters can go a LONG way. When they go on sale, a 10 pound bag for less than $5.00, I am SURE to grab one because I can bake it up and have several meals of shredded chicken in the freezer. (There are SO many recipes I use them in!) Usually, it will take me 2 or more pans to bake off all the chicken. I'll bake it, serve up a few pieces for dinner that night, then put the rest (minus the bones and skin!) in the freezer, portioned for a few more meals. Then I got a roaster.
Before I bought a roaster for Thanksgiving (to make cooking everything at the same time easier) I made myself promise it would get LOTS of use. Even though it was on sale, I wanted to be sure I could use it more than once a year.
So, I was really excited to see that the WHOLE bag of chicken quarters fits, bakes evenly and there's enough room that the skin browns and crisps nicely.

Plus it leaves the oven free for other things...like...I dunno... cookies!
I'm also looking into MORE uses for my roaster, if you know any- let me know in the comments! :)

Saturday, November 23, 2013

Make-Ahead Thanksgiving- Dishes That Freeze Well

You can save time in the kitchen this Thanksgiving by making some of your dishes ahead. And, if you have the room for them, even make them well in advance and freeze them.

These dishes freeze well, and you won't lose any texture or flavor:

  • Dressing/Stuffing
  • Sweet potatoes if they are mashed or in casserole form
  • Mashed potatoes if you use plenty of cream and butter
  • Corn casseroles
  • Squash casseroles
  • Yeast breads and rolls
  • Gravy 
  • Cookies
  • Fruit pies (not pumpkin)- assemble, but do not bake prior to freezing. Pies may be baked from frozen state (just add a bit of extra time.)
You may be tempted to freeze the kind of pies that you can buy in the supermarket frozen- but remember, those factory-made pies have added stabilizers to make them freeze-able. That's something the home-cook cannot replicate. 

To use, simply defrost in the refrigerator (except cookies and breads!) and warm in the oven. 

Saturday, October 26, 2013

The Easiest Mock Butterbeer Recipe Ever


We still love the Harry Potter franchise over here at the Disheveled household. And every Halloween we try new recipes of the delicious and magical foods found in the books and movies. This year, I wanted to develop a simple butterbeer, that can be doubled or tripled as needed, tasted yummy, and didn't require me going to the city to get butterscotch sauce. (Which was in the former easiest recipe I had found.) I worked out one that passed the picky Potterhead taste test, (x3), and to boot- if you use diet soda, can be carb-free!

Here it is...
so easy...

Mix together:

  • 2 12oz cans of cream soda (or diet cream soda)
  • 1/4 tsp imitation butter flavoring (we use Watkin's)
  • 2 drops of caramel flavoring
  • 1 1/2 teaspoons of heavy cream
Just mix it. Pour it. Drink it.
Makes about 4 servings. Two if they're huge.

Feel free to share with a link! Here's a Pinterest image :)

Tuesday, October 22, 2013

Homemade Fake Blood For Halloween


In a pinch, or if you don't want to spend money on a tiny tube of the stuff, fake blood can easily be made at home with every day ingredients. This recipe can be used safely on the face, on cloth (I've always used clothes I was going to throw away for bloody costumes...) or anywhere you can wash up.


You will need:

  • 1 cup plain/light corn syrup
  • red food coloring
  • blue food coloring
  • and if wanted for an old/not fresh blood look, green food coloring
  • 1 Tablespoon cornstarch
In a bowl, or a jar (I use a jar so I can just toss on a lid and store), put your corn syrup and 40-50 drops of red food coloring. If using gel coloring, or wanting to adjust your color feel free to experiment.
 This step will give you a cherry-red color, not at all how blood looks.
This is where the blue comes in. Add a SINGLE drop of blue food coloring, and mix thoroughly.
Much better. Looks VERY dark in the jar, but if you get some out you will see it is still red, and not as purple as it seems.
But it looks a little too see-through, so that is where the corn starch comes in. Add one tablespoon and mix like crazy. Now you have cheap, slowly dripping, chemical-less fake blood.

Feel free to experiment, not everyone's drop are the same and you may want yours to have a different look. Also, if you want a more less fresh, old blood look, (getting brown...), simply add 3-5 drops of green food coloring.

Feel free to pin on Pinterest, and share freely on Facebook, etc.


Wednesday, September 4, 2013

Shanah Tovah! Moist Honey Apple Cake


Our house LOVES this cake, not just for holidays, but pretty much all autumn and winter long. Not overly sweet, dry or spiced, this cake is a perfectly rounded honey cake with just enough apple-goodness.

Preheat your oven to 325 degrees and spray a NON STICK bundt pan with a release. I use an olive oil one with great results. (A non stick is very important because of all the honey in the batter.)

You will need:
  • 3 eggs
  • 1 cup of honey
  • 3/4 cup light brown sugar
  • 1 cup oil (a light oil)
  • 1 teaspoon of vanilla extract
  • 3 cups of flour (I use 2 AP, and one wheat- very delicious!)
  • 1 teaspoon baking powder
  • 1 teaspoon baking soda
  • 1/4 teaspoon salt 
  • 2 teaspoons cinnamon
  • 1/4 teaspoon nutmeg
  • pinch of ground ginger
  • 4-6 apples of choice, pealed and grated. (I zip them through the grater on my food processor. It makes them uniform, and doesn't give them time to brown.) You can use any apples you like, this isn't a pie where you need firm pieces, so if they cook down into the batter it doesn't hurt it.
and for the glaze:
  • 1 cup powdered sugar 
  • 1 tablespoon, or slightly less,  almond milk or your choice of dairy substitute. (or milk if you're not making it kosher!)
  • splash of vanilla extract
In a large mixing bowl beat your eggs until they are creamy-yellow and a bit foamy. Beat in your honey until fully incorporated. Then you can easily beat in your brown sugar, oil, and vanilla extract. 

Over the top of the mixture, SIFT the remaining DRY ingredients. Stir until mixed. Fold in your apples. Depending on the size of your apples, you will have about 4-5 cups of gratings. 


Spread the thick batter into your prepared bundt pan. Bake for around 70 minutes before checking. A skewer into the middle of the ring will come out clean, and the sides of the cake should shrink slightly away from the edges of the pan. It may take up to 90 minutes, this is a very moist cake.

Let cook in the pan for about 10 minutes to help with releasing without breakage. Then turn over onto a plate, platter or rack to continue to cool thoroughly. It make take a couple hours because of the density.


To make the glaze, mix your splash of vanilla and about 1/2 of a tablespoon of your milk/substitute. Incorporate as  much as you can before adding more liquid splash-by-splash until the right consistency. You'll want it pretty thick, about like honey. Drizzle onto the cake. You can just use a fork, or pipe it on with a bag. Let dry before cutting.

Tuesday, March 12, 2013

Easy and Cheesy Quinoa Bites

These are a tasty, and reasonably healthy, treat we whip up when we want a warm savory snack. I make a large batch of quinoa in the beginning of the week for lunches, and often we have it as a side dish- so I just grab some from the fridge (it makes great leftovers!) and pop these together.


Preheat your oven to 400, and spray a mini muffin pan with non-stick pray, or brush with the tiniest of olive oil.

In a bowl, mix together

  • 2 cups cooked and cooled quinoa (mine is often mixed white & red, yum!)
  • 1/4-3/4 cup shredded cheese. Any kind or mixed kinds. If it is strongly flavored, you may wish to use less. 
  • 1 beaten egg
  • a pinch of salt
  • pepper or other seasonings to taste. 
Use a cookie scoop, or spoons to divide the mixture evenly among the muffin cups. Don't pack tightly. 


Bake 12-18 minutes, or until golden and the edges just start to crisp. 

Monday, February 4, 2013

Whole Wheat Calzones

Delicious and gooey, while being both chewy and a bit crispy, what isn't to love about calzones. You can fill 'em all the same, or let each family member fill theirs with their favorite items. This recipe makes 4-6 calzones, depending on size.

In a mixing bowl combine 1 C or warm water, 1/2 tsp white sugar and 1 packet (or 2 1/4 tsp) yeast. You can use regular or quick-rise. (Quick-rise if you're HUNGRY ;-) ) Let sit for 5-15 minutes. (5 for quick rise, 10-15 for regular yeast.) It will get frothy.

Add in 1 tsp kosher salt, and 2 1/2 C wheat flour. (If you use this recipe with white flour, use 3 C, as the wheat soaks up more moisture.) Mix until smooth, then knead for 7-10 minutes until more elastic. Lightly oil a bowl with olive oil, and let the dough ball rise in it until doubled in size. (Time will depend on your yeast.)

Divide your dough into 4-6 pieces, and roll into balls. Let these rest for 15 mins will you get your fillings together. Fillings can include, (but get creative!) pizza sauce, cheese, pepperoni, sausage, peppers, onions, etc.

Preheat your oven to 500. Roll each ball thinly with a rolling pin, fill carefully on one side of the dough circle. Fold over the empty side of the dough circle, and crimp shut with your fingers or a fork. Poke the tops of each calzone with a fork once to let out some steam. Place all your calzones on a baking sheet (or 2), and brush with an egg-wash. (1 egg and 1T milk or water.) Bake until golden. (Time will depend on size, and your oven.)

I couldn't get super great pictures, the sun had already gone down and my kitchen lights are horrendous for pictures. But gooey cheese and crisp-chewy crust, YUM!

Saturday, February 2, 2013

Great Deal on Leapfrog Videos

Right now Wal*mart.com has a printable coupon for $2.00 off two select Leapfrog videos.

We just love Leapfrog over here, for school and for fun. The coupon is valid for "Adventures in Shapeville Park" and "The Magnificent Museum of Opposite Words". The former is on sale for $12.73, but "The Magnificent Museum of Opposite Words" is currently on sale for only $9.98, a good price, but with the $2.00 off- $7.98 is a great price.

(I don't get anything for sharing the link- I just thought it was too great a deal to pass up sharing!)

Thursday, January 3, 2013

Are You Going to IMATS?

I know I still have some readers from when my make-up blogging was done here, plus some new readers who might love to hear this...
BFTECosmetics (one of my favorites, if you can't tell by my EOTDs!) is FINALLY going to IMATS!
So, if you're there {I, sadly, will not be =-( } swing by booth #805. If you're one of the first 500 customers you'll get a great special gift. And if you're not, you'll still leave HAPPY!


Quick disclosure...yes, she did ask for bloggers to post, with a chance of winning a GC- but if you look back you'll see I've posted pretty much all her sales and new for years, and would very likely post this as well! ;-) (Holy run-on sentence!)