Tres Leches Cake

Delicious for any occasion

Homemade Watercolors

For homeschoolers, or just fun at home

DIY Toothpaste

Great for good health, and a happy pocketbook

Vegetarian Meals for the Whole Family

Even picky kids will love these meat-less dishes

Sewing Projects and Tips

Even more tutorials to come soon

Showing posts with label Homeschooling. Show all posts

Saturday, February 2, 2013

Great Deal on Leapfrog Videos

Right now Wal*mart.com has a printable coupon for $2.00 off two select Leapfrog videos.

We just love Leapfrog over here, for school and for fun. The coupon is valid for "Adventures in Shapeville Park" and "The Magnificent Museum of Opposite Words". The former is on sale for $12.73, but "The Magnificent Museum of Opposite Words" is currently on sale for only $9.98, a good price, but with the $2.00 off- $7.98 is a great price.

(I don't get anything for sharing the link- I just thought it was too great a deal to pass up sharing!)

Thursday, October 11, 2012

Cloud Dough

There's a new sensation in our house, and for the time being has replaced our much-loved homemade playdough. Cloud dough. It's mold-able, it's soft, it's interesting to feel, and it's easy to clean up! You've gotta love it when your manipulative toys are messy fun but don't linger.

We made what looks like is a "half-batch" judging by the posts on the internet- but it was just the right amount for one little four-year-old. It was crazy simple:
Mix in a large bowl or small tub-
  • Four cups of flour
  • and 1/2 cup of baby oil
We used (food grade) mineral oil because that's what we keep on hand, you need to be sure to only use baby oil or food grade mineral oil or your cloud dough will get rancid and stinky FAST. I have since bought a small bit of baby oil to make another heavenly-scented batch since EVERYONE in the house loves playing with it!

It may take a seemingly long time to work all the oil in, but you want all the flour thoroughly coated. A good 5-7 minutes of working the oil in with your hands should do the trick. We thought the finished dough felt like a fluffier "Moon Sand".

We keep ours in a lidded plastic"shoe box", and it's kept for several months. I'll be sure to smell before each playtime and toss if needed.

We also added some scent oil that smells vanilla-y, and The Princess loves to form little pies and cakes with it using my tiny tartlet molds.

Wednesday, October 10, 2012

Peanut Butter-less Pinecone Bird-feeders: Great For Kids With Allergies

Pinecone bird-feeders are always a big hit, for the kids having fun making them, and for the birds who get a tasty treat. We've been unable to make any for a few years though, because our youngest is allergic to peanuts. Then I read a genius idea somewhere on the internet- use shortening to stick the seeds! Now, the idea is super, but I felt that shortening wouldn't be a great choice for birdies, so I went with a choice birds love, and is better for them- lard!


Simply cover your pinecones with a bit of lard, filling in some space so you can cram a lot of seed on/in there. I tied my string (couldn't find my twine! =-( ) before we covered them to cut down on mess. Even the little one could do this step, so it was a craft for everyone.
Next, put your wild birdseed into a small tray so you have room to move your pinecone around and cover it thoroughly.Even with the tray, our table got a bit messy, but nothing that wasn't easy to clean. ;-)

I popped ours into the fridge to set up. And, just like the peanut butter versions, hang your feeders during cooler/cold weather to prevent the whole thing from melting off of the cone.

This should bring happy little birdies for us to watch this Autumn!


Monday, August 20, 2012

Ella the Elephant is all Ears

This week The Princess and I are working on Ee, and the color grey. OF COURSE this week will involve ELEPHANTS! And, since we are also doing a lot of ear things....we needed to do some elephant ears.

How cute are little hand-print elephant ears? Super cute! First I found an elephant face clip art. I erased the ears, broadened the lines for little hands to cut, and put it in a document for printing. I printed on draft so that The Princess could paint it herself, but it is grey in the document so I could share it and those who didn't want extra drying time could still use it! Here's our quickly-done-a-little-crooked-but-preschoolers-cut-that-way-anyways elephant face. ;-)

We painted with watered-down grey paint (and by "we", I really mean "she painted while mommy sat there...)

Then we blotted with a little tissue to make it look like wrinkly elephant skin.
After it dried, she cut it out and we glued it onto some thick paper. Then we made some hand-print ears with non-watered down grey paint. (Which apparently tickles...a LOT!)
Ella the Elephant!

Friday, August 17, 2012

Little One Errand Food: Part 2

Today we're heading into the city today, and decided to make our snack box within the themes of this week's school stuff. We are working on the letter G. (The Princess is so excited that her name has a big G AND a little g!) We also worked with the color green. Today's snack box is a G/green box.

We have:
  • a fruit salad with grapes, kiwi, and green apples.
  • goldfish crackers. (OK, so they're whales here...don't tell The Princess!)
  • her favorite- green olives.
  • and a granola bar.
  • and a spiffy green sword to eat it with!

Tuesday, August 14, 2012

Make Your Own Learning Games: Color Sorting and Matching Box

Whether or not you are homeschooling, many education games will keep your little ones entertained for hours. One of ours is this color sorting and matching game. And since we've found boxes that the egg-carton base fits in, it's just gotten better ;-)

You can either start with a 1 1/2 dozen carton- cut in half, or cut down a bigger 2+ flat into a 3x3 square.

I used to keep my egg-carton games (I have more I'll be sharing...) in gallon zipper bags, but I recently discovered that they fit PERFECTLY into the Twinings' 50-count boxes. I knew I saved them for a reason!

What your egg-cartons are made of will determine what you use to paint your wells with. I used old-ish nail polish fine in these cardboard ones. But that will eat Styrofoam ones, so use plain ol' craft paint.

Randomly paint the bottoms of each well with one color. Here I have white, , pink, orange, red, yellow, purple (looks blue on here!), blue, green, and black. I've used brown before when we've had trouble finding little black items to sort.


Next, gather items to sort. If you have really small ones, be very careful in case they get into and mouth the preschooler's game!
We have pompoms, beads, bits of ribbon, little erasers, etc. We were still gathering when this picture was taken and later for black we also added a lego, a tiny tire, small checker piece. (Just to give you ideas!)

We put them in a snack-sized baggie, and it fits perfectly in the box too. You can also add for extra manipulation activities, large tweezers or a clothespin to pick up items &/or a plastic spoon for scooping.
Little ones love this game because they can "play" it however they want! Any way to meet the objective of sorting the object into their colored wells works!


Thursday, March 22, 2012

Little One Friendly Errand Food

Occasionally we have appointments "in the City", an hour away, and quite often they fall when or around when our preschooler is wanting lunch. She is not a morning person, I may as well be asking her to simply walk into Mordor if I'm gonna ask her to eat earlier. We've been getting along just great making a mini (her sized) "bento box" before we go. The secret to a perfect sized box? Using a sandwich container. I love the Rubbermaid ones. Sturdy, easy to clean, and the lids stay in shape! I effin' hate warped lids!

This lunch was a big hit, every bite gobbled up: a butterfly cut turkey and baby spinach sandwich. Grape tomatoes pre-sprinkled with kosher salt and some pepper. And a few prunes and dried apricots. {Menu-planning let me know that we were having cheese with dinner...so there's her dairy ;-) }

Tucked into another container were some mini pretzels and pumpkin seeds, with a few extras in case a big brother wanted to share. ;-) Also, a little 100% juice box.


What do you do to keep the troops fed in the car?

Tuesday, March 20, 2012

Let's ALL Try This!: Easiest Colored Rice


Colored rice is one of our favorite things around here for homeschool use. We play in it, we use it glued to paper like glitter, we shake it around, it's a great tool.

My long-time friend Shannon just started a blog (yay!) and she posted a great, EASY way to color rice...USING your little preschoolers! So smart! So, go check it out. =-)


Monday, January 16, 2012

Fives, Counting To and Counting By

This week The Princess and I have been working on the number 5, as well as planting some basil for our kitchen window. We combined these two for a fun activity she loved. We're counting and learning about plants!

We went into the pantry, and grabbed some beans.
We used some pintos, chick peas, white beans, red beans, black beans and lentils. We also grabbed 3 paper towels and 6 snack-sized zip-lock bags.  We cut the paper towels in half and the width was perfect for the bags. Folded into fourths, we lightly wet them and tucked them into the bags.

We counted together 5 of each bean, and put each group in a bag. We counted as we took them out of the container, into the bag, and as we lined them up in the bag. That was a lot of counting to 5. 

Then, we hung them up and counted them in their bags- BY five. We talked about how each group of 5 added up to thirty, and how we saved time counting in fives. 

We're also counting as we check them for sprouts and discuss how they are growing and the parts of the plant. This activity will last us weeks!
Lentils

Red beans

White beans

Chick peas

Pintos

Saturday, January 7, 2012

Another Cute Find + a Mini Giveaway

Remember when I blogged about finding some super cute shaped ice cube trays at Halloween time? This week I found another cute tray at Dollar General. Just in time for Valentine's day!
I got three...two for making ice...and one for crafts. They were a buck each, niiiice.

My first craft.....
Crayons!
I used my microwave to melt my crayon bits since I'm not really sure these cheapy trays are really silicone....I'd hate to melt them!

Each little "set" has a reds-pinks heart, an oranges-yellows heart, a greens heart, a blues heart, and a purples heart. They're a big hit at my house, and I can't wait to see what else I can make! (I'm thinking soaps!)

Followers of the Disheveled Mommy Facebook page may have noticed a new tab on the page. "Top Fans". Just a cute little way to acknowledge all the little comments and love you leave. This week, since I have an extra set of little heart crayons, I'm gonna pass them on! I'll check the "Top Fans" tab Saturday evening, and the follower who's sitting at #1 will be sent the set! (So, you must be following us on FB to participate...)


Wednesday, January 4, 2012

My Solution: Mini Glitter Jars

My preschooler LOVES glitter. She also loves to glue glitter to paper. It's gorgeous, but because I don't want 7 jars of glitter on my floor, I have to dump it into piles of a manageable size for her. She hates that. She wants to shake it. I do not blame her.
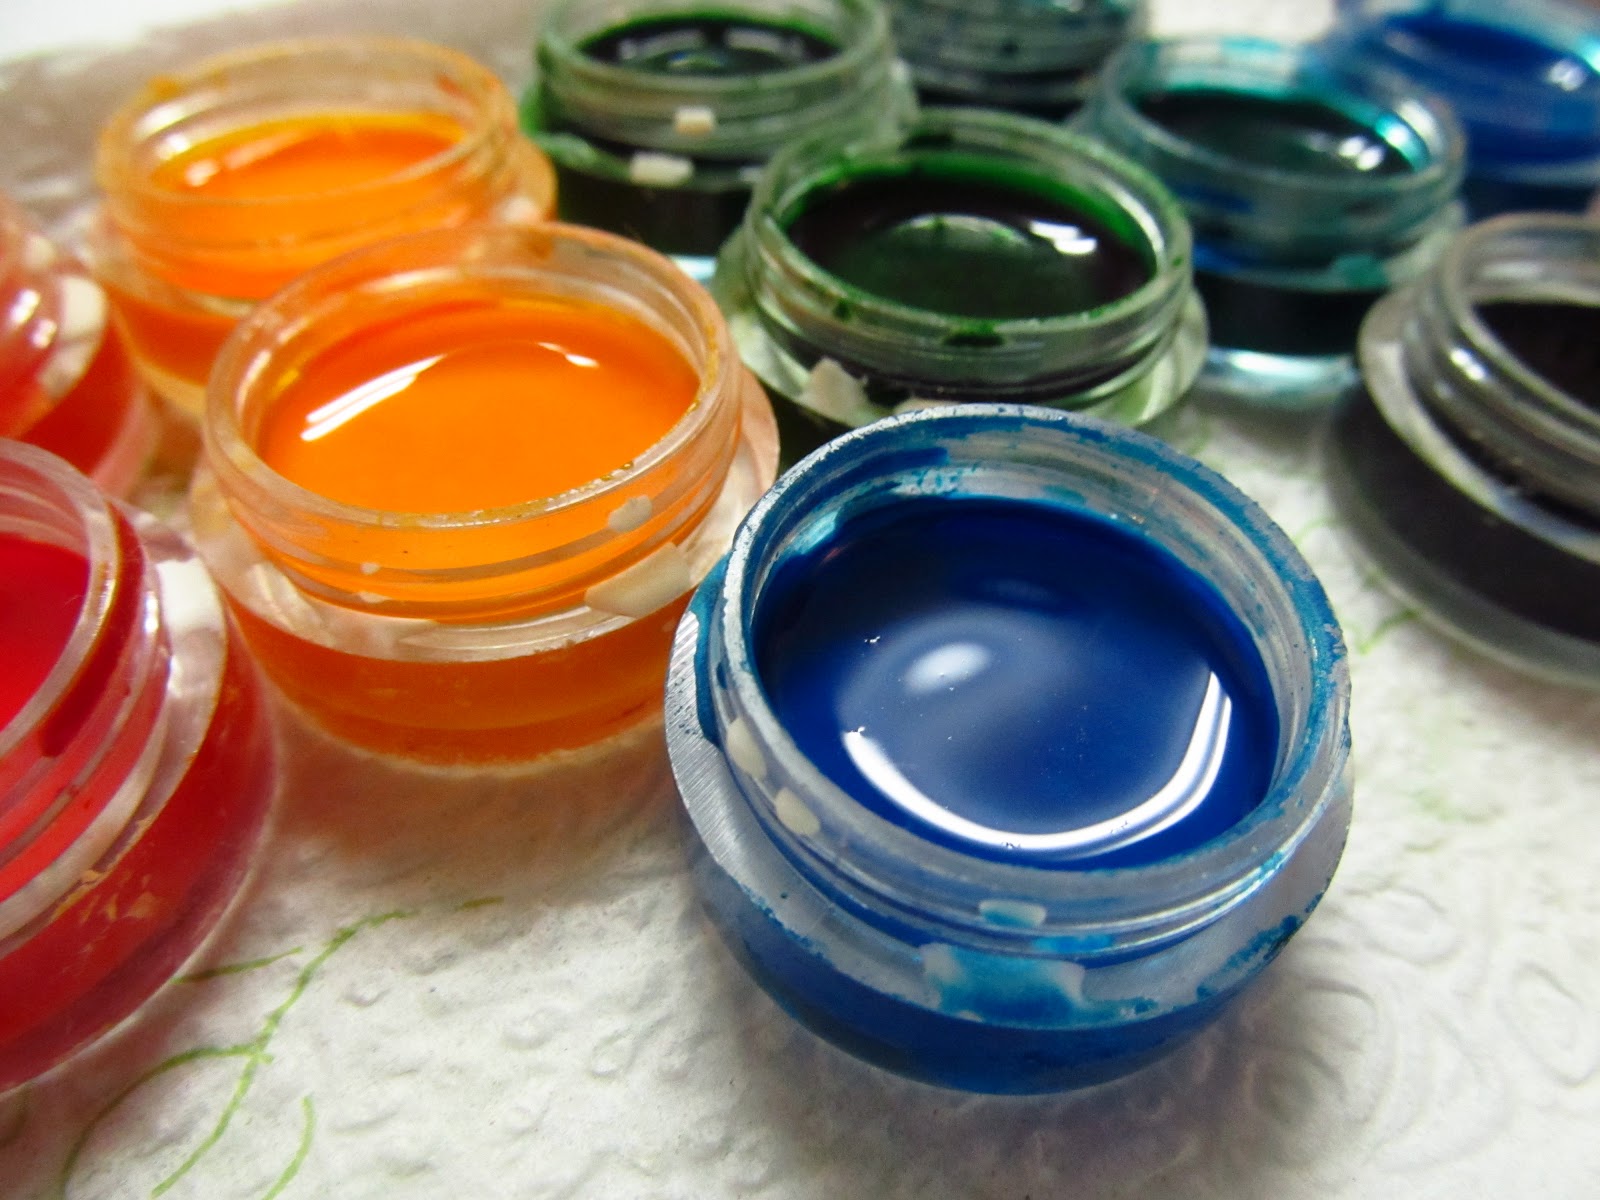
Soooooo...I finally came up with a solution! Remember those make up jars I mentioned in the previous post? The ones I used for little watercolor pots? They were PERFECT for a bit of each colored glitter! And even better, they stacked up nicely in a little star-shaped bowl I had, so she can grab and put away this activity as needed. (Like when I'm cooking! Or scrubbing!) I put a little snap-shut container for glue in the bottom, that she can open, but it still shuts tight. The glue can be painted on the paper with a little brush, or q-tip. Now I'm thinking of other activities that can fit inside these bowls for her.


Monday, January 2, 2012

Homemade Fun: Watercolors

She CAN blend!
Lately out little artist has fallen in love with watercolor painting. So, naturally, I googled to see if there was a way to make our own! TONS and TONS of hits. The most repeated recipe seems to be this one:

  • 3 Tablespoons of baking soda
  • 3 Tablespoons of corn starch
  • 1 1/2 teaspoons corn syrup
  • 3 Tablespoons white vinegar
  • Several drops of food coloring for each color made
Mix all but the coloring together. Wait for the fizzing to stop, and stir thoroughly. Poor into your chosen containers. I saw everything from ice cube trays, to plastic baby food cups, and craft-store mixing pallets. I chose to re-purpose some little jars I have washed for re-use that are from mineral make up I previously pressed into pallets. I've got several uses for these I'll be sharing as I remember to photograph them!

Next, have a little fun mixing in your colors. I noticed as mine dried that I should have taken into consideration that my containers were smaller than most others...and my extra drops of color rose to the top and impeded drying. I panicked for a quick moment, then ran and grabbed a few cotton balls. I barely touched them to the excess, and the wicked it right up! WHEW!

Let dry overnight, and enjoy.


And they even have handy lids! =-)

Sunday, December 11, 2011

Holidays on a Budget: Holiday Card Holder

Here is a simple wreath for displaying your holiday cards. You only need a few items to make it, and it makes a great busy project for an older kid.

Begin with cutting an eleven-inch circle from some sturdy cardboard. You will also need a five-inch hole out of the center.
 

Next, cover this in some wrapping paper. Be sure to cut slits or notches in around the edges of the paper so it will cover the curves nicely.

Next, you can paint your clothespins, or cover them with the same paper. A coordinating paper would be nice too. To cover the pins cleanly, apply your glue, and press to the backside of your paper. You'll want to use a piece of paper bigger than your clothespins, and let them dry thoroughly before trimming the paper down. You can also coat with some Modge-Podge or similar coating for protection.
 Arrange your 12 clothespins around your wreath. Secure with hot glue. You can also add some ribbon to the center to make it more wreath-like. (We did...) By the time your pins are filled with cards around the outer edge, the ribbon in the middle will be a nice touch.

Tuesday, December 6, 2011

Holidays on a Budget: DIY Plastic Wreaths

Looking for an easy, but time consuming craft to keep the kids busy? Or maybe just one that's durable? Then grab a wire clothes hanger, a couple of white trash bags and some scissors.

Bend (or is it unbend?) your hanger into a circle. Some people like to leave the hook on for hanging, but I clip that sucker off. I also covered the part where I twisted it back together with a little tape so no one would get scratched. I also totally forgot to take a picture of this.

Next, fold your trash bag(s) in half lengthwise until you have a controllable width to cut. Cut into inch-ish sections.
That paint in my thumbnail will just NOT go away!


Then, cut each strip into pieces about six inches long. (I got 8 with each strip.)
Now we'll tie our strips to our wire form. A billion hitch knots... I believe this one is called a Cow Hitch. I'm not sure exactly what words can describe this best, so yay pictures!
Make a U shape, lay under the wire. (You can do this holding it, but I can't hold it and take pictures.)
 Bring your tails up over the wire, and through the loop.
Pull taught, and repeat. Fill your form.
Add some decorations, (yay hot glue!) and you're done. Simple for all your kiddos to do, but will keep them ridiculously busy all afternoon. Lovely.
I'm thinking about trying it with a green cheapy vinyl tablecloth for a green one!