Tres Leches Cake

Delicious for any occasion

Homemade Watercolors

For homeschoolers, or just fun at home

DIY Toothpaste

Great for good health, and a happy pocketbook

Vegetarian Meals for the Whole Family

Even picky kids will love these meat-less dishes

Sewing Projects and Tips

Even more tutorials to come soon

Showing posts with label Thrifty. Show all posts

Friday, February 28, 2014

Great Luck and Big Coupon Savings at Target

My friend and I just went into "The City" to do some couponing. Living in a rural area, we get a little limited in what we can do with our coupons in town. Our little grocer is just like many small grocers, and they do not accept printed coupons- which, sadly, is what most really good coupons seem to be lately. So, off we went, with a plan, a prayer, and printed coupons.

While perusing the make up aisles of WalMart looking for deals, we came across some tear pads for Maybelline. Good for $2.00 off any two Maybelline products, they could come in handy some day, so we grabbed a few. We got our items, and went on to the next store, Target.


At Target we REALLY lucked out. Among the items on the shelves (not even IN the clearance section!) were some items ON CLEARANCE and for a GREAT price. Like, we would have totally snagged some of them up JUST on clearance price. But things only got better from there, because we had our $2.00 coupons!
Here are the items I got- at their retail price:

  • Dream Nude Airfoam Foundation- $8.59- I got two of these.
  • Color Show Nail Lacquer- $2.99
  • SuperStay 14 Hour Lipstick- $6.99
  • SuperStay 24 Hour lip products- $7.99- I got two of these as well. 
My total retail price for these six items would have been $43.14. Wow...

But here's what they were marked down to:
  • Dream Nude Airfoam Foundation- $2.57 each
  • Color Show Nail Lacquer- $0.88
  • SuperStay 14 Hour Lipstick- $2.08
  • SuperStay 24 Hour lip products- $2.38 each
That's already only $12.86! Then with three of our newly-found coupons I paid a whopping $6.86+tax!


Wednesday, January 22, 2014

GREAT Find at Dollar General- HUGE Clearance Sale Going On!

Today a friend & I stopped in at Dollar General and found out they were having a heck of a clearance sale. .25 for Christmas items! We got TONS of Christmas decorations fro next year...wreaths, ornaments, poinsettia arrangements... EVERYTHING was a quarter! Even the gifts that were in Christmas packaging were a quarter. I've never seen a sale like this. I picked up a couple "remote caddies", I had stolen ours for my make up brushes-ha! Right now one of the new ones is sitting on our dining room table as a silverware/napkin caddy.
They also had all Christmas baking supplies on clearance for a quarter as well. Even the spices that they only carry at Christmas...no where close to expiring! We picked up plenty of rubbed sage, ginger, nutmeg, etc for .25... about a $3.00 savings around here...per jar! Sprinkles, cake mixes, candies, and frostings were the same. We really wished we had some coupons, we'd have made it out of there with free items!

Dollar General really knows how to have a clearance sale! Check and see if your local store still has some left! 


Monday, January 6, 2014

Roasters Are for More Than Thanksgiving (Pt.1?)

Chicken quarters can go a LONG way. When they go on sale, a 10 pound bag for less than $5.00, I am SURE to grab one because I can bake it up and have several meals of shredded chicken in the freezer. (There are SO many recipes I use them in!) Usually, it will take me 2 or more pans to bake off all the chicken. I'll bake it, serve up a few pieces for dinner that night, then put the rest (minus the bones and skin!) in the freezer, portioned for a few more meals. Then I got a roaster.
Before I bought a roaster for Thanksgiving (to make cooking everything at the same time easier) I made myself promise it would get LOTS of use. Even though it was on sale, I wanted to be sure I could use it more than once a year.
So, I was really excited to see that the WHOLE bag of chicken quarters fits, bakes evenly and there's enough room that the skin browns and crisps nicely.

Plus it leaves the oven free for other things...like...I dunno... cookies!
I'm also looking into MORE uses for my roaster, if you know any- let me know in the comments! :)

Tuesday, October 22, 2013

Homemade Fake Blood For Halloween


In a pinch, or if you don't want to spend money on a tiny tube of the stuff, fake blood can easily be made at home with every day ingredients. This recipe can be used safely on the face, on cloth (I've always used clothes I was going to throw away for bloody costumes...) or anywhere you can wash up.


You will need:

  • 1 cup plain/light corn syrup
  • red food coloring
  • blue food coloring
  • and if wanted for an old/not fresh blood look, green food coloring
  • 1 Tablespoon cornstarch
In a bowl, or a jar (I use a jar so I can just toss on a lid and store), put your corn syrup and 40-50 drops of red food coloring. If using gel coloring, or wanting to adjust your color feel free to experiment.
 This step will give you a cherry-red color, not at all how blood looks.
This is where the blue comes in. Add a SINGLE drop of blue food coloring, and mix thoroughly.
Much better. Looks VERY dark in the jar, but if you get some out you will see it is still red, and not as purple as it seems.
But it looks a little too see-through, so that is where the corn starch comes in. Add one tablespoon and mix like crazy. Now you have cheap, slowly dripping, chemical-less fake blood.

Feel free to experiment, not everyone's drop are the same and you may want yours to have a different look. Also, if you want a more less fresh, old blood look, (getting brown...), simply add 3-5 drops of green food coloring.

Feel free to pin on Pinterest, and share freely on Facebook, etc.


Saturday, February 2, 2013

Great Deal on Leapfrog Videos

Right now Wal*mart.com has a printable coupon for $2.00 off two select Leapfrog videos.

We just love Leapfrog over here, for school and for fun. The coupon is valid for "Adventures in Shapeville Park" and "The Magnificent Museum of Opposite Words". The former is on sale for $12.73, but "The Magnificent Museum of Opposite Words" is currently on sale for only $9.98, a good price, but with the $2.00 off- $7.98 is a great price.

(I don't get anything for sharing the link- I just thought it was too great a deal to pass up sharing!)

Friday, October 26, 2012

My Favorite Toothpaste Recipe


Natural toothpaste recipes that actually taste good are few and far between. Googleing will give you a few options, but this one remains my favorite.

I make a pretty decent-sized batch,
In a bowl, combine 1 part coconut oil with 1 part baking soda. My big batches are 3 Tablespoons of each.

That's basically it, if you don't care for flavorings. If you'd like to flavor your toothpaste, also add 1 packet of stevia sweetener. ONLY stevia and xylitol are safe for your toothpaste. You wouldn't want to add sugar and rot your teeth, and don't get me started on the artificial sweeteners... ;-) I got a box of stevia packs at Dollar General for only a buck!
For a classic pepperminty toothpaste, add some peppermint oil.
This batch, we made a yummo Raspberry Mint....so it's a touch pink.
 Mix it all together until all lumps are gone.
Then just spoon into containers, or if you wish, a snack-sized ziptop bag. You can snip a tiny corner off the bag and squeeze out the toothpaste.


Monday, October 22, 2012

Delicious and Easy Pumpkin Muffins

Autumn is in there air, and pumpkin is in everything! Yummo! Here's a quick and easy recipe I whipped up one day when I just couldn't find one that fit my craving.

Preheat oven to 375.
Just toss this all in a bowl:
Mix thoroughly, but do not over beat. Best done by hand, and quick with just a silicon spatula.

Divide among a 12-well muffin pan that has been lightly greased or lined with paper liners.
Bake for 16-20 minutes.


(Edit: Ooooooo...look at all these pumpkin recipes too!)

Thursday, October 11, 2012

Cloud Dough

There's a new sensation in our house, and for the time being has replaced our much-loved homemade playdough. Cloud dough. It's mold-able, it's soft, it's interesting to feel, and it's easy to clean up! You've gotta love it when your manipulative toys are messy fun but don't linger.

We made what looks like is a "half-batch" judging by the posts on the internet- but it was just the right amount for one little four-year-old. It was crazy simple:
Mix in a large bowl or small tub-
  • Four cups of flour
  • and 1/2 cup of baby oil
We used (food grade) mineral oil because that's what we keep on hand, you need to be sure to only use baby oil or food grade mineral oil or your cloud dough will get rancid and stinky FAST. I have since bought a small bit of baby oil to make another heavenly-scented batch since EVERYONE in the house loves playing with it!

It may take a seemingly long time to work all the oil in, but you want all the flour thoroughly coated. A good 5-7 minutes of working the oil in with your hands should do the trick. We thought the finished dough felt like a fluffier "Moon Sand".

We keep ours in a lidded plastic"shoe box", and it's kept for several months. I'll be sure to smell before each playtime and toss if needed.

We also added some scent oil that smells vanilla-y, and The Princess loves to form little pies and cakes with it using my tiny tartlet molds.

Wednesday, October 10, 2012

Peanut Butter-less Pinecone Bird-feeders: Great For Kids With Allergies

Pinecone bird-feeders are always a big hit, for the kids having fun making them, and for the birds who get a tasty treat. We've been unable to make any for a few years though, because our youngest is allergic to peanuts. Then I read a genius idea somewhere on the internet- use shortening to stick the seeds! Now, the idea is super, but I felt that shortening wouldn't be a great choice for birdies, so I went with a choice birds love, and is better for them- lard!


Simply cover your pinecones with a bit of lard, filling in some space so you can cram a lot of seed on/in there. I tied my string (couldn't find my twine! =-( ) before we covered them to cut down on mess. Even the little one could do this step, so it was a craft for everyone.
Next, put your wild birdseed into a small tray so you have room to move your pinecone around and cover it thoroughly.Even with the tray, our table got a bit messy, but nothing that wasn't easy to clean. ;-)

I popped ours into the fridge to set up. And, just like the peanut butter versions, hang your feeders during cooler/cold weather to prevent the whole thing from melting off of the cone.

This should bring happy little birdies for us to watch this Autumn!


Monday, October 1, 2012

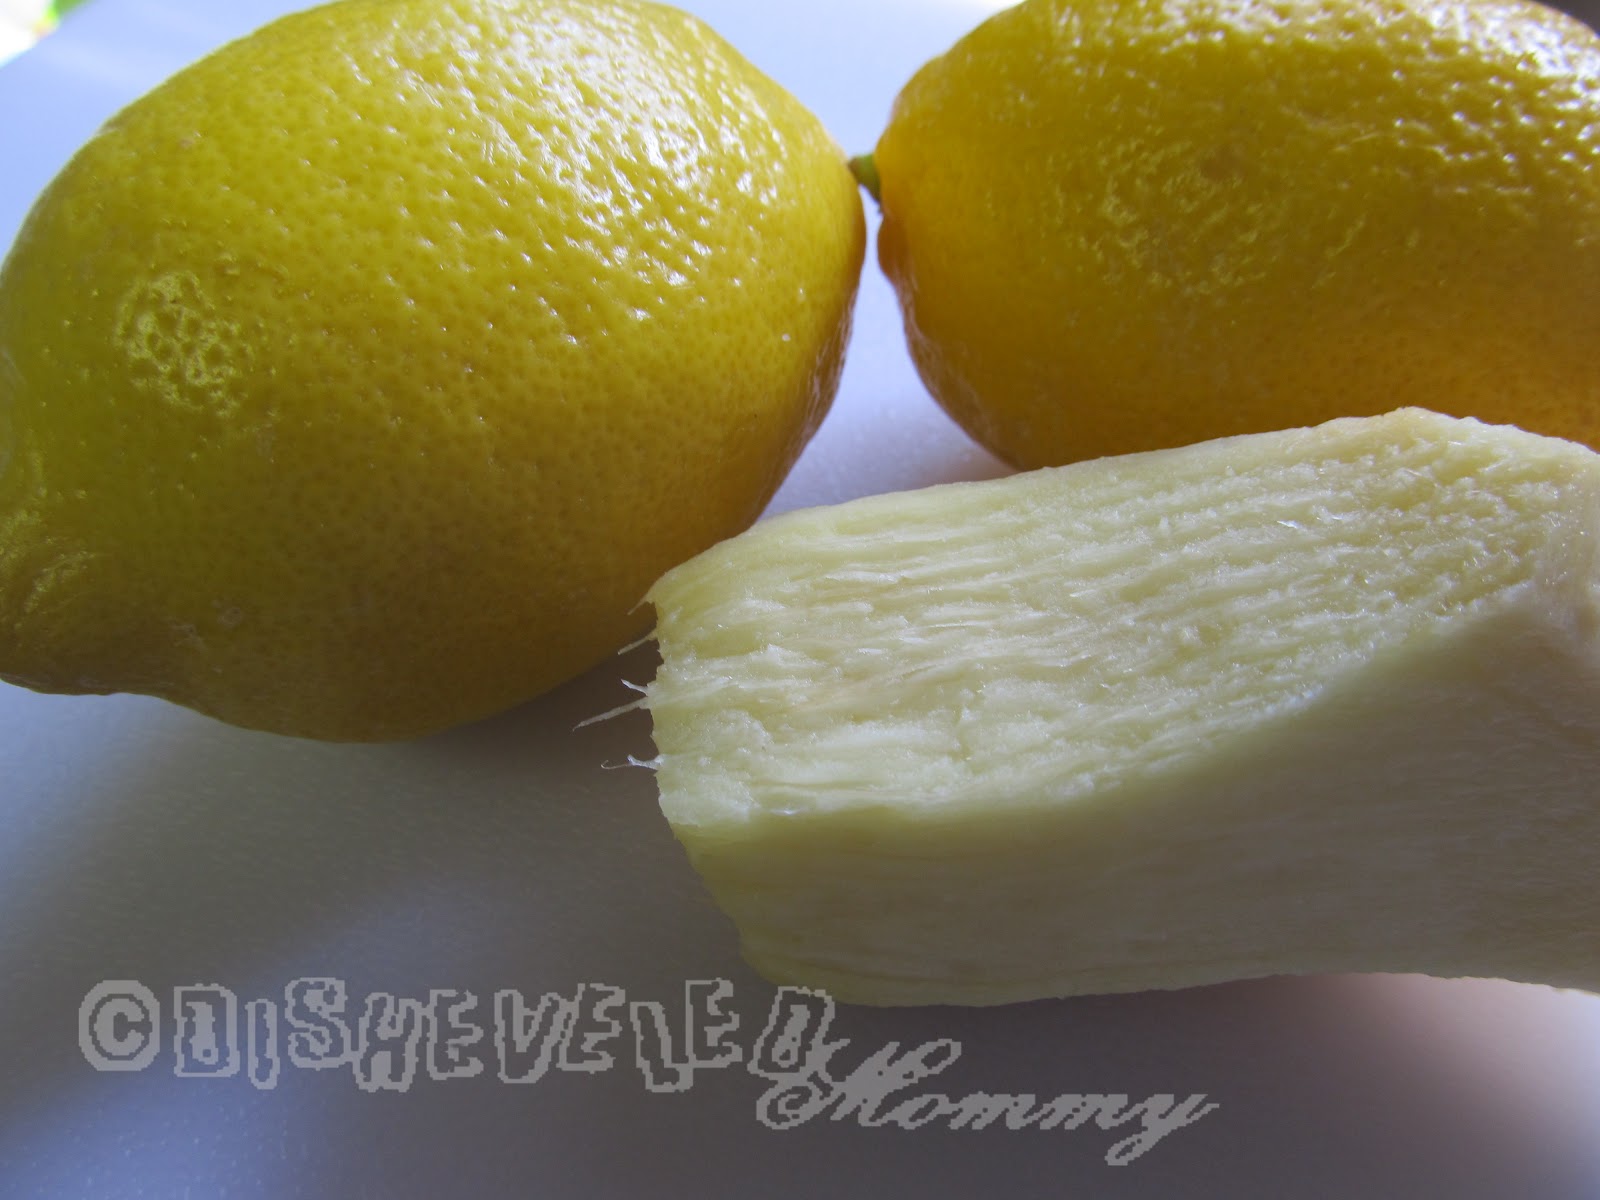
Lemon-Ginger Throat Soother

This weekend, I was SO glad to have a big jar of this on hand! Chuck-full of lemon and ginger, this honey concoction is great as tea, or an additive to teas in soothing Autumn and Winter throat ailments.


I made a big (family-sized) jar, so I needed 2 or 3 lemons, and about 3 inches of ginger. If you make a small bit, you'll need just one lemon, and just an inch of ginger.


Cut your lemons into fourths, then slice very thinly. Grate your ginger with a microplane grater.
Layer in your jar with honey.

Let sit in your fridge for at least four days.
To use, add a spoonful to a mug of hot water for a soothing tea, or add to hot tea to boost its soothing properties. 

Tuesday, August 14, 2012

Make Your Own Learning Games: Color Sorting and Matching Box

Whether or not you are homeschooling, many education games will keep your little ones entertained for hours. One of ours is this color sorting and matching game. And since we've found boxes that the egg-carton base fits in, it's just gotten better ;-)

You can either start with a 1 1/2 dozen carton- cut in half, or cut down a bigger 2+ flat into a 3x3 square.

I used to keep my egg-carton games (I have more I'll be sharing...) in gallon zipper bags, but I recently discovered that they fit PERFECTLY into the Twinings' 50-count boxes. I knew I saved them for a reason!

What your egg-cartons are made of will determine what you use to paint your wells with. I used old-ish nail polish fine in these cardboard ones. But that will eat Styrofoam ones, so use plain ol' craft paint.

Randomly paint the bottoms of each well with one color. Here I have white, , pink, orange, red, yellow, purple (looks blue on here!), blue, green, and black. I've used brown before when we've had trouble finding little black items to sort.


Next, gather items to sort. If you have really small ones, be very careful in case they get into and mouth the preschooler's game!
We have pompoms, beads, bits of ribbon, little erasers, etc. We were still gathering when this picture was taken and later for black we also added a lego, a tiny tire, small checker piece. (Just to give you ideas!)

We put them in a snack-sized baggie, and it fits perfectly in the box too. You can also add for extra manipulation activities, large tweezers or a clothespin to pick up items &/or a plastic spoon for scooping.
Little ones love this game because they can "play" it however they want! Any way to meet the objective of sorting the object into their colored wells works!


Sunday, August 5, 2012

Quick Tip: Freezer Organization

Since we just have a small, above the fridge type freezer- and 5 people, I am forever working on ways to maximize our space. This also helps minimize our food budget! The key to keeping a freezer effective and efficient is organization.
One of my favorite findings is freezing items FLAT so they stack and fit nicely.
I also LOVE using baskets to keep things grouped together, AND to keep them from falling out on me.


Another tip that homemakers use for freezers of all sizes is inventorying them. I used to keep mine in my Home Binder, but it was sometimes hard to remember to cross off when I'd use something. So, I switched to posting my chart on the fridge. That seemed to work, except it fell a lot, got drawn on by little artists, was a dirt magnet, etc. Now I use an index card system. Simple to do, simple to read, and stays both handy for Mom and out of the way of grubby little snatchers.
It's super easy to meet YOUR needs. I use the following categories: beef, pork, chicken, veggies, other, desserts/juices (we hardly ever have either! lol), and ingredients/condiments/etc.

The meats are pretty self-explanatory.  I'll have some things that are cooked and portioned into family-sized servings (like ground beef), and some that are marinating. The card should tell me what's going on. Somethings are just popped into the freezer because I got them on the sell-by date and I hadn't time to fix them up. Since my charcoal steaks say nothing about them, I know I'll have to slice them up or something when I go to use them. 

"Other" has things like leftovers we like for lunches- but not the next day. Such as chili, curry, etc. Hot dogs also go here because we seldom have them, and they are often mixed meats. I have some catfish nuggets in the freezer right now, so that's there too.

Things like my cubes of tomato paste, cubes of grated ginger, and pork fat for rendering are in the "ingredients..." category. When I get butter on sale, it goes here too.

I go through a lot of "Veggies" cards. To simply it, I break some things like ears of corn into family-serving sizes. Other things I mark how much is left rather than cross the whole bag off.

It's all right there for me to make my menu plans/shopping lists with a magnetic clip. (4 for $1 in the dollar bins at Target.) Every once-in-a-while, when a card is full or too messy to read, I'll go through and re-write the unused items from it on a clean one. This week my "beef" card is nice and pretty! ;-)

Tuesday, July 31, 2012

Cute Gathered Sleeves Make an Over-sized T-shirt Better- A How-To

The Princess earned a t-shirt during the summer reading program this year. She LOVES her shirt, but gets annoyed at how the too-big-for-her shirt hangs. So, I decided to fit it too her to make her happy, and so she wouldn't look pants-less during the parade she was going to walk in with the library!

Most of it is just cutting down and stitching back up, but we went for cuter, girlie-er sleeves.
Here's how to do it:

First, wearing the shirt inside out, (either you or the owner of the shirt...), mark where you will need to take it in and how far to shorten it. Take it off and pin up the sides nice and straight for sewing up. I also chopped off the arms, and marked where new ones would go. Sew up until the armholes on both sides. Loose the picture you took for your blog, and move on to the arms.

Make a pattern with paper half the diameter of the arm holes, a rounded edge, and a scant inch lip on the straight edge. Like this:
Use the original arms you cut off to cut out two new arms.

With right-sides together, pin the center of the new sleeve to the center seam of the t-shirt. (Straight edges together too!)


Start pinning and gathering the sleeves. The small straight edges will need to go against the straight edge of the t-shirt.

Sew it together, and enjoy it's adorableness.
You may also want to try the shirt on again, and hand-sew to adjust the way the sleeves lay in the profile view. (A) hasn't been fine tuned yet, and (B) has been tacked a bit:

[We also lost the collar, and added ribbons ;-) ]

Saturday, July 21, 2012

Quick Tip For Storing Task-Specific Supplies

We've started making our own laundry detergent since I've found a mixture that you don't mix with water/need a bunch of extra space for. I don't have a laundry area or laundry room, but I did want to keep the ingredients and hardware used away from little hands and out of the way.
So, I bought a CHEAP set of measuring cups, a set of wooden spoons (used one for my "kit") and a cheapo grater so I could mark these tools and keep them in a plastic tub with the ingredients.
Now, this kit has a lid and is tucked away safely. I even have a bag of extra detergent that didn't fit in my container in there so I won't be searching for it later.(I even mix the detergent up in the tub too!)


Saturday, June 16, 2012

Homemade Natural Soft Scrub

Here's another use for Dr. Bronner's Castile soap that I use around the house. It's quick and easy to make, so you can always whip it up when needed, and not have it sit around.

Simply mix together 3 parts baking soda, and one part Dr. Bronner's or other Castile soap.
Cut together with a fork, it'll start to look like a tiny batch of biscuits. =-)
Stir in drops of water, as needed, until it becomes a creamy paste.
There are many "recipes" out there that include vinegar. While I am a BIG fan of cleaning with vinegar, NEVER mix vinegar with Castile soap. It unsaponifies the soap, separating it and making it useless. Oily and useless.

Now that you've got your scrub, you can clean all over the place.

Coffee spill under the maker and dry on the counter?

A little soft scrub with a rag:
Gone with little effort!
Little ones are getting the fridge all grubby?
Gone.
 Happy cleaning!