Tres Leches Cake

Delicious for any occasion

Homemade Watercolors

For homeschoolers, or just fun at home

DIY Toothpaste

Great for good health, and a happy pocketbook

Vegetarian Meals for the Whole Family

Even picky kids will love these meat-less dishes

Sewing Projects and Tips

Even more tutorials to come soon

Showing posts with label Recycling. Show all posts

Tuesday, August 14, 2012

Make Your Own Learning Games: Color Sorting and Matching Box

Whether or not you are homeschooling, many education games will keep your little ones entertained for hours. One of ours is this color sorting and matching game. And since we've found boxes that the egg-carton base fits in, it's just gotten better ;-)

You can either start with a 1 1/2 dozen carton- cut in half, or cut down a bigger 2+ flat into a 3x3 square.

I used to keep my egg-carton games (I have more I'll be sharing...) in gallon zipper bags, but I recently discovered that they fit PERFECTLY into the Twinings' 50-count boxes. I knew I saved them for a reason!

What your egg-cartons are made of will determine what you use to paint your wells with. I used old-ish nail polish fine in these cardboard ones. But that will eat Styrofoam ones, so use plain ol' craft paint.

Randomly paint the bottoms of each well with one color. Here I have white, , pink, orange, red, yellow, purple (looks blue on here!), blue, green, and black. I've used brown before when we've had trouble finding little black items to sort.


Next, gather items to sort. If you have really small ones, be very careful in case they get into and mouth the preschooler's game!
We have pompoms, beads, bits of ribbon, little erasers, etc. We were still gathering when this picture was taken and later for black we also added a lego, a tiny tire, small checker piece. (Just to give you ideas!)

We put them in a snack-sized baggie, and it fits perfectly in the box too. You can also add for extra manipulation activities, large tweezers or a clothespin to pick up items &/or a plastic spoon for scooping.
Little ones love this game because they can "play" it however they want! Any way to meet the objective of sorting the object into their colored wells works!


Tuesday, July 31, 2012

Cute Gathered Sleeves Make an Over-sized T-shirt Better- A How-To

The Princess earned a t-shirt during the summer reading program this year. She LOVES her shirt, but gets annoyed at how the too-big-for-her shirt hangs. So, I decided to fit it too her to make her happy, and so she wouldn't look pants-less during the parade she was going to walk in with the library!

Most of it is just cutting down and stitching back up, but we went for cuter, girlie-er sleeves.
Here's how to do it:

First, wearing the shirt inside out, (either you or the owner of the shirt...), mark where you will need to take it in and how far to shorten it. Take it off and pin up the sides nice and straight for sewing up. I also chopped off the arms, and marked where new ones would go. Sew up until the armholes on both sides. Loose the picture you took for your blog, and move on to the arms.

Make a pattern with paper half the diameter of the arm holes, a rounded edge, and a scant inch lip on the straight edge. Like this:
Use the original arms you cut off to cut out two new arms.

With right-sides together, pin the center of the new sleeve to the center seam of the t-shirt. (Straight edges together too!)


Start pinning and gathering the sleeves. The small straight edges will need to go against the straight edge of the t-shirt.

Sew it together, and enjoy it's adorableness.
You may also want to try the shirt on again, and hand-sew to adjust the way the sleeves lay in the profile view. (A) hasn't been fine tuned yet, and (B) has been tacked a bit:

[We also lost the collar, and added ribbons ;-) ]

Wednesday, January 4, 2012

My Solution: Mini Glitter Jars

My preschooler LOVES glitter. She also loves to glue glitter to paper. It's gorgeous, but because I don't want 7 jars of glitter on my floor, I have to dump it into piles of a manageable size for her. She hates that. She wants to shake it. I do not blame her.
Soooooo...I finally came up with a solution! Remember those make up jars I mentioned in the previous post? The ones I used for little watercolor pots? They were PERFECT for a bit of each colored glitter! And even better, they stacked up nicely in a little star-shaped bowl I had, so she can grab and put away this activity as needed. (Like when I'm cooking! Or scrubbing!) I put a little snap-shut container for glue in the bottom, that she can open, but it still shuts tight. The glue can be painted on the paper with a little brush, or q-tip. Now I'm thinking of other activities that can fit inside these bowls for her.


Monday, January 2, 2012

Homemade Fun: Watercolors

She CAN blend!
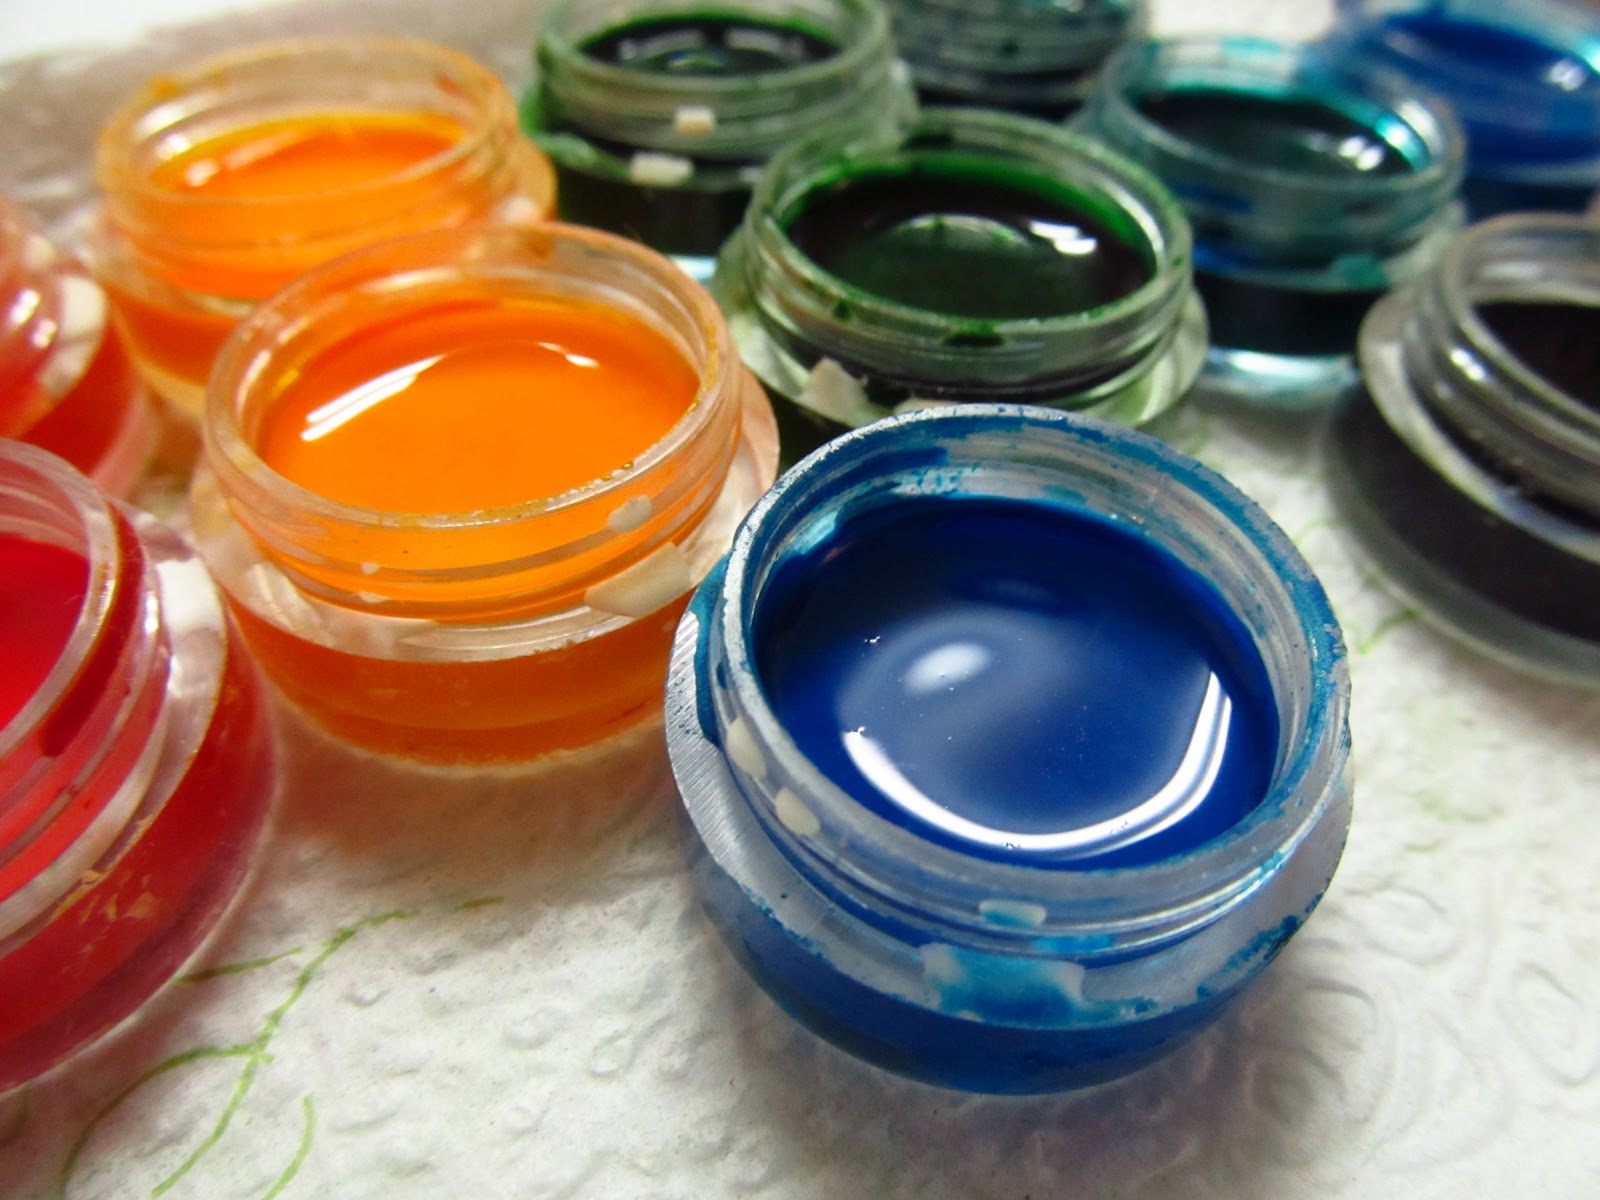
Lately out little artist has fallen in love with watercolor painting. So, naturally, I googled to see if there was a way to make our own! TONS and TONS of hits. The most repeated recipe seems to be this one:

  • 3 Tablespoons of baking soda
  • 3 Tablespoons of corn starch
  • 1 1/2 teaspoons corn syrup
  • 3 Tablespoons white vinegar
  • Several drops of food coloring for each color made
Mix all but the coloring together. Wait for the fizzing to stop, and stir thoroughly. Poor into your chosen containers. I saw everything from ice cube trays, to plastic baby food cups, and craft-store mixing pallets. I chose to re-purpose some little jars I have washed for re-use that are from mineral make up I previously pressed into pallets. I've got several uses for these I'll be sharing as I remember to photograph them!

Next, have a little fun mixing in your colors. I noticed as mine dried that I should have taken into consideration that my containers were smaller than most others...and my extra drops of color rose to the top and impeded drying. I panicked for a quick moment, then ran and grabbed a few cotton balls. I barely touched them to the excess, and the wicked it right up! WHEW!

Let dry overnight, and enjoy.


And they even have handy lids! =-)

Tuesday, December 6, 2011

Holidays on a Budget: DIY Plastic Wreaths

Looking for an easy, but time consuming craft to keep the kids busy? Or maybe just one that's durable? Then grab a wire clothes hanger, a couple of white trash bags and some scissors.

Bend (or is it unbend?) your hanger into a circle. Some people like to leave the hook on for hanging, but I clip that sucker off. I also covered the part where I twisted it back together with a little tape so no one would get scratched. I also totally forgot to take a picture of this.

Next, fold your trash bag(s) in half lengthwise until you have a controllable width to cut. Cut into inch-ish sections.
That paint in my thumbnail will just NOT go away!


Then, cut each strip into pieces about six inches long. (I got 8 with each strip.)
Now we'll tie our strips to our wire form. A billion hitch knots... I believe this one is called a Cow Hitch. I'm not sure exactly what words can describe this best, so yay pictures!
Make a U shape, lay under the wire. (You can do this holding it, but I can't hold it and take pictures.)
 Bring your tails up over the wire, and through the loop.
Pull taught, and repeat. Fill your form.
Add some decorations, (yay hot glue!) and you're done. Simple for all your kiddos to do, but will keep them ridiculously busy all afternoon. Lovely.
I'm thinking about trying it with a green cheapy vinyl tablecloth for a green one!

Wednesday, November 30, 2011

Holidays on a Budget: Advent Paper Chain

Advent calendars are used in many households. I remember my Grandma bringing one candy-filled, beautifully illustrated calendar for each of us every year. She always bought them at the Exchange, and they were filled with tiny, delicious German chocolates. Mmmmmm.

Having a little one around, we've opted for a more visual countdown to Christmas, a paper chain. Easy to make, colorful, and economical. You can have each of the children make a chain for themselves, or like us, have one larger chain displayed. This year, instead of stapling our chain to the wall, I've made it look more like an intentional decoration. I whipped together an adorable "holder", that the chains can be hung on year after year, and gives them a bit of a more finished look.

First, I cut 3 bell shapes out of some thin cardboard. I used an empty cereal box. Recycling! Then I spray painted them with some gold paint. I only did the edges of the back two, and only just in case they peeked from behind the top layer. You can paint the brown, papery side for a flocked looking bell, and the smooth side that was the outside of the box for a shinier bell.
Then, I simply glued the layers together. Three seemed to be the perfect strength, as well as gave me the perfect arrangement for my ribbons. I hung one shorter length between the bottom and middle layers at the top. This was my hanging ribbon. Then, between the middle and the top layers, at the bottom, I glued a longer ribbon that the last link in the paper can be thread through before stapling shut. Placing the ribbons on different layers kept the cardboard from having a big gap, or big bulges.


Sunday, November 13, 2011

Craft Tutorial: T-shirt Infinity Scarf

Infinity scarfs are cute, versatile, and easily adapted to wear the ways you like. Even as a necklace! Here's how to throw one together, I made one for myself from one of Hubby's old torn up shirts, as well as one for The Princess from one of big brother's shirts WHILE I made dinner.

First grab your shirt. I totally didn't think about picture taking until I was a bit through the process, but you know what it looks like to grab a shirt. =-D You will want a soft t-shirt WITHOUT seams on the sides. It doesn't have to be a thick one either, thin under-shirts work just as well, as long as they have seam-less sides.

You are going to want to cut off the hem of the shirt, then chop it off about where the sleeves meet the trunk. The one I used from Hubby has a big hole that went a little below that, but cutting it that inch or so shorter didn't seem to matter.

Then, you are going to want to cut slits, going around the shirt horizontally, across your belly if you were wearing it. BUT leave a 1/2-3/4 inch space of material. Like this:


Now, you want to hold that nice, uncut, sturdy bit in your hand and grab the looped strands with the other hand. Slowly, but firmly stretch the strands until they curl up into themselves. They will start to look quite lovely.

Now, we're going to want to do something about that sturdy bit holding it together. Get a needle and a fair amount of thread. If you have cheap needles and/or already tender fingertips, grab some pliers too- it helps with the layers! I was lazy, and used the dark thread that was already out, but it was ok because it wasn't seen by the end.

You're going to want to weave your needle in and out and do a rough running-stitch through the length of the uncut portion. Neatness doesn't matter, you're just wanting to tack this all together, and gather it up.
Pull and gather it all up. Turn your needle about and go through again, from the opposite side, then again from the first side for good measure.
I also ran the thread around my bunch before I tied it off.
These are all the same shirt...just sucky lighting


Next, take a scrap of your shirt, and cut off a 1 inch x 1 1/2-2 inch rectangle. Neatness doesn't matter. Length doesn't matter much, because you won't need it all, but that extra bit makes it easier to hold while you get it attached. You'll cut the extra off. Stretch this rectangle a bit to get it to start to curl, it will help it look tidier. Stitch it to your bunched up part to cover it, much like a bow.
Ignore the flower you see peeking out until the next step ;-)
This one is left plain

You can leave it like this, use it as a spot to add a broach, or other bit of decoration, or you can make and sew on a super-cute flower like this: 

Take some of your t-shirt, and draw/cut out some simple flower shapes. I folder my material over so I had two of each size, small, medium, and large. I also cut out one tiny set of petals.
Next, you need to stack them all up, largest on the bottom. You can also give these a tiny bit of stretch to make them curl a bit.
Tack them together with a tiny X, but before tying off your thread, add a lovely little bead. Mine is nothing fancy, it is from a pack I found in the dollar bin at Dollar General. I also found it easier to STILL not tie-off and just sew the flower to the scarf now.


Wednesday, November 9, 2011

Easy-Peasy Decorating

Lately I've been seeing spray-painted jars for decorating crop up all over the place. And then, someone had the great idea to spray the INSIDES of the jars for a more polished look. I wanted to try this out, but also wanted a jar or two that I could use for multiple decorating uses. I decided to paint mine gold. Perfect for Autumn decorating, and can seamlessly move on into Christmas, then maybe even Valentine's and St. Patrick's with the right accessories.

I carefully, and very lightly, sprayed coats into my recycled pasta-sauce jar. I think I did about 3 or 4. VERY light ones.
I can't wait to try this with other shape/size jars and different colors!

Monday, June 13, 2011

Easy DIY Gel Potpourri

Gel potpourri, it's not cheap. There are recipes all over the internet that use unflavored gelatine to make lovely gel air fresheners using recycled home glass on the cheap. But, as these evaporate and release their fragrance into the air, they start to shrink, and start looking rubbery and well- not so pretty anymore.
Here is a great way to make a home air freshener CHEAPLY, recycle pretty glass containers, and use your favorite liquid potpourri with out a flame.

You will need:
  • Some liquid potpourri (anywhere from $1-3, I've even gotten it on clearance for .50 before)
  • Some water absorbing crystals. (Found online and in most craft stores. I recommend getting them online from feeding-insect suppliers. Cheaper.)
  • A pretty little glass jar. (I recycle my Glade candle jars for home purposes.)
Read the directions on your crystals. This bag I have (.99 for enough dry crystals to make a gallon wet.) says to use 1 tsp for 8 oz of liquid. I used 1/2 tsp in my jar.
Then, I poured in about 4 oz of my liquid potpourri. (I eyeballed it.)


Mmmmm...that looks delicious...I'd better make sure no one drinks it while it has it's 30 minute rest!
Plastic wrap over the top, a firm "DO NOT DRINK!" That should do it!
A-half-hour later, a lovely home fragrance.
The best part...as the crystals start to dry out- you just add a splash of liquid potpourri and they are revived! As beautiful as ever!
& I think I may need to remove some tea lights from some in-use jars and get some more made!

Monday, April 4, 2011

Kinda Tutorial: Mini/Play Oven Mitts

Here is a method, disguised as a tutorial, on how I threw together my little one's play oven mitts that will go with her new play kitchen she'll get for her birthday soon. That is one long sentence.

First, you'll want some fabric. Either enough of one color/pattern for your mitt, or mitts, or two coordinating fabrics. I used old baby clothes of hers. (I also turned her old favorite dresses into an apron, but that's another post...) You only need a bit, toddlers and pre-preschoolers are known for their awfully tiny hands. ;-)

I did an outline of her little hand, and added about an inch-ish all around to get a pattern to trace. I slip-stitched, so I needed very little seam allowance, but you may need to add an extra 1/4 inch if sewing by machine. I can also try to make a printable pattern if you all would like...


You'll want to trace on the wrong-side of the fabric, and be sure to flip the pattern over for the opposite hand. (If making a pair.) Match the pieces right-sides together. Hem the bottom edges if needed. I cut mine out against the hem of the shirts I used. Lazy never looked so lovely.


You're going to want to add a little loop for hanging (just like real mitts...) I used the straps off one of my shirts (that I cut the mitts out of...) for one, and bits of ruffled collar off an other for a second pair. You can used almost anything, ribbon, a bit of bias tape, hemmed scraps, etc...
You'll want to place you loop between your layers like so:
Pin or baste in place.  (The lighting is wacky because I did this at night...lol)

Sew around, leaving the bottom open. (Hey, sometimes we need little reminders- MOMMY BRAINS!)

Turn right-side out and smooth the rounds on the inside with a chopstick.
I also made matching mini tea towels by sewing the edging off the cuffs of the shirts I used to some CHEAPY white washcloths. The kind that are about 18 for $3 and scrub so awesomely. You can also use ribbon, lace, bias tape, etc here as well, but the edges I cut off just fit perfectly and matched! I did the top & bottom of the washcloth. I may make some more when she's a bit older & more sophisticated, adding a bit of embroidery. =-)

Sunday, September 19, 2010

We've Got Spirit, Yes We Do!

Even if we have tiny little toddler hands! =-)
This year we have a Peewee footballer. Which means all sorts of family cheering! Being so far away from major stores though, sometimes things are harder to find- one of them being poms in all sorts of colors. We came up with an idea to make poms out of those cheap $1 tablecloths you can get from the dollar stores. (We got ours from Dollar General.) You can usually find these in almost every color, & they are very thin & easy to cut... & now I have an itch to find other uses for these, because everyone knows they are worthless as tablecloths. We made these small for a little one to hold, but the idea can be manipulated for all sizes.

*Note- There was NO way to get pictures of a this process full-sized, so I made it tiny so I can photograph. So, ignore the rough-cut edges, and the not-to-scale-ness. To-scale would involve math. No thank you!

Begin by cutting your tablecloth in half width-wise.
We used 1/2 of a tablecloth for 1 pompom. Take your first half & cut width-wise into 4 strips.
Now, take one of your strips & fold up length-wise into something easier to cut- then cut into 1/2 inch strips.
Repeat with the 3 other pieces. You'll have a pile of little scraggly strips.
Unroll them, & layer them nicely-ish across a good-sized piece of string.
Gather the string around the stack, & tie tightly. arrange the strips into desired shape as you tighten. (This one's skimpy because I gave up on unrolling all my tiny little strips-lazy...)
We made a good-for-her sized handle by folding over the string & wrapping it in duct tape, then in electrical tape. I'm sure there are lots of other ways to make handles to-size. =-)