Tres Leches Cake

Delicious for any occasion

Homemade Watercolors

For homeschoolers, or just fun at home

DIY Toothpaste

Great for good health, and a happy pocketbook

Vegetarian Meals for the Whole Family

Even picky kids will love these meat-less dishes

Sewing Projects and Tips

Even more tutorials to come soon

Showing posts with label In the Kitchen. Show all posts

Monday, August 4, 2014

Meatless Monday: Three Sisters Stuffed Chiles

Three Sisters, the harmonious growing and eating of delicious corn, beans, and squash. It has developed into quite a lot of culinary applications, and at out house is loved stuffed into various foodstuffs. A favorite, green chiles. The three items compliment and complete each other, and taste amazing together.

You can use what ever type of beans and squash you like or have on hand, it's pretty versatile.

Begin with your chiles. (You can also use peppers if you wish!) You can slice in half lengthwise to fill, or cut off the stem end to fill. I go the stem end route.

After you have your chiles/peppers ready to go, lightly saute about a half-cup of diced onions in 2 tablespoons of butter. (Seems like a lot, but it won't be later...)

 While you do that, dice your squash. You'll want it at about 1/4 inch. We used zucchini here, because that's what looked good at the grocer this week. It was a medium sized squash that gave us about a cup diced.

When your onion is ready, turn off the heat, add your squash and stir. It will use up the rest of the butter and sliiiiiightly cook.

In a bowl, combine one cup of frozen or fresh corn, and a cup and a half of beans. (Canned or home-cooked...) We used black beans here. Mix in your onion/zucchini mixture. Add to that a tablespoon of lime juice, a teaspoon of cumin, and salt to taste. I also added a half-cup of shredded cheese to help slightly bind it. This will still be a very loose stuffing.

Begin stuffing into your chiles/peppers. If you are using the chiles and stuffing from the top, make the first couple spoonfuls very loose, and kind of wiggle the goodies down to the pointed end. If halved, you'll just need to spoon it on. Arrange in a pan and preheat your oven to 400.

Bake for about 20-25 minutes, sprinkle with more cheese if desired, and let it go another 15 minutes or so.

We like to serve them with tortillas to help get the lose filling and cheesiness to our mouths.


Saturday, February 22, 2014

To Market To Market- It's About Thyme!

Here's the second installation of my To Market To Market tries/reviews. The first can be found here. I really did a lot with this packet of It's About Thyme!, I made a cheese spread as suggested, and so much more.


I made the cheese ball recipe, scaled down to a household size of course, and it was delicious. Fair warning, this blend is QUITE garlicky, even after mellowing in the fridge for a bit. HOWEVER, they do give a recipe for a softer-flavored mix on the pack as well. We love garlic, so we went with the stronger one and it was soooo good!

I had all the ingredients on hand, but not everyone has Feta cheese at all times. We make a lot of Mediterranean salads. We just mixed together:

It was super simple, and although it calls for whipping it up in a food processor, I just did it by hand and everything mixed smoothly. (Warm Feta still smooshes into the mixture well.) Then we just let it sit, covered, in the fridge for a few hours. (The directions say at least 3 hours, but we also ate some after being in there overnight.)

I also made a bit of the herb-butter listed on the pack, SO easy to just add the blend to taste in some softened butter. I served it with some warm, fresh rolls and it got promptly gobbled right up. 

I also tried it as a seasoning, rather than in a recipe. I had made some Broccoli-Kale Chowder that it was delicious in, as well as just sprinkling it on some baked chicken. 

Although this blend makes a wonderful cheese ball/spread and a fantastic herb-butter,  it is its versatility that really makes it shine. What other products can you find that are so adaptable? 

You can find To Market To Market online, and on Facebook if you'd like to find out more, or check out other products. 

Disclaimer:
I did receive product to try and talk about, but I did not receive ANY other compensation. I also was not told, or suggested to, what to say and ALL opinions are MY own. 

Wednesday, February 19, 2014

To Market To Market- Popeye's Passion

I was recently lucky enough to get to try a couple things from To Market To Market, and couldn't wait to share them with you! I'm going to split my post into two, so each item can get its own time to shine. (Edit to add, the second post can be found here.)

So, today's yummy yummy treat was Popeye's Passion. Upon reading the back of the pack, I saw it made FOUR cups of dip, enough for a party. But, seeing as I'm not one to party, I decided to pare it down a bit. I also wanted to take this opportunity to healthy-up the dip. VERY easy to do when it's a mix, so much better than buying a dip from the store you have no control over its ingredients.

The suggested recipe on Popeye's Passion calls for 1 1/2 cups of sour cream, and 1 1/2 cups of mayo. I decided to go with plain yogurt as my base. It covers all that's needed to replace the sour cream and mayo, tang, creaminess, and dippability. (I'm gonna make that a word, ok?)

Since the pack said it makes 4 cups of dip with that 3 cups of base and the pack, I figured 1/3 of the pack and 1 cup of yogurt would make a nice, manageable amount for my un-party. I made sure to empty the pack into a jar and shook it VERY VERY well, to keep the ingredients evenly mixed. I didn't want to mess up the ratio of the recipe. I used an old yeast jar that I save for things like spices and stuff that come in packs. The amber-colored glass helps keep light out, and they close quite tightly to keep things fresher, longer.

Mixed together, and let sit covered in the fridge for 3 hours (at least) as suggested.

Wow, it came out AMAZING. To be honest, I wasn't expecting the spinach to be enough, I am a big spinach lover... but the yogurt re-hydrated it, and there was plenty. 

There is also bit of other veggies in there, looks like some carrots maybe, and they gave it a great flavor. It was also well seasoned. None of the overly-salty, or almost chemical-ish flavor a lot of packages dips and seasonings have. I used mine for vegetables, but it would be great on almost anything. I think I'm going to get some pita chips for the next batch. I might even experiment some with additions, make it my own. 

You can find To Market To Market online, and on Facebook if you'd like to find out more, or check out other products. 

Disclaimer:
I did receive product to try and talk about, but I did not receive ANY other compensation. I also was not told, or suggested to, what to say and ALL opinions are MY own. 

Thursday, February 6, 2014

Chia & Protein Pudding

I've been trying to incorporate lots of protein into my daily diet, both to facilitate weight loss and because it is sometimes an area I am lacking. A lot of times I will use non-animal sources because that's what I prefer, or a whey-based protein powder. (Like Plexus 96!)

This pudding contains a protein powder, and chia seeds, both widely used by people looking to lose weight, or just eat healthier options. It is also VERY easy!

You will need:

  • 1 cup of either almond milk, or coconut milk. I LOVE to use dark-chocolate almond milk, so yummy!
  • 1 serving of your preferred protein powder. I love that Plexus 96 ALSO has many vitamins and minerals. 
  • 3-4 tablespoons of chia seeds. More for a thicker pudding, even less (like 2 tablespoons...) and you can make it a smoothie-type drink that satisfies. 
Put all ingredients in a blender, and blend. 


Pour into your desired container (or 2, I like to make 2 smaller snack-servings!) and chill in the fridge to set-up at least 4 hours, but over night works best.


Enjoy!


*disclaimer... YES, the Plexus 96 link IS to my Ambassador page, but I was not asked to, or compensated for this post. It is just a preferred, and yummy new protein powder I wanted to share! :) 

Monday, February 3, 2014

EASY Cake Batter Cookie Bars

Cookie bars are an easy way to throw together a quick dessert, and by starting with a cake mix- they are just that much easier!


You will need:

  • One box of white cake mix, OR the yellow mix that TASTES LIKE THE WHITE, not a butter cake mix
  • 5 TB melted butter
  • 2 beaten eggs
  • A jar of sprinkles. One of those 2.5-3oz ones
Mix together the first 3 ingredients. Mix in about 3/4ths of the sprinkles. Wow, so tiring. ;)
Spread the mix into a 9x13 pan, sprinkle on those remaining sprinkles. Bake at 350 for about 15-20 minutes. Cool in the baking pan, then cut into preferred-size bars.
Enjoy!
My five-year-old loves these, and can pretty much make them by herself! (Except for the hot oven part of course!)

Saturday, January 11, 2014

Sugar-Free Chocolate Candies

I saw a GREAT post over at Suzie Homemaker's Facebook page for a diet/sugar-free chocolate candy to bust your sweet tooth. We used to occasionally get the sugar-free chocolates because Mr. Disheveled is diabetic, and I am always dieting. BUT- I didn't like that they were made with sucralose (Splenda). Because of the um-tummy troubles- it gives, and because I try to avoid chemical sweeteners (and ingredients in general.) These have stevia, a natural sweetener, and also coconut oil, which we've been adding to our diet for The Princess' eczema and overall health reasons. Win. (It is also NO COOK!)

I made a couple changes to the original, because The Princess is allergic to peanuts, and I wanted to use my dark chocolate cocoa powder. (I've been putting it in everything- YUM!)

It is really quite simple too.
Mix together in a bowl:

  • 1/4 cup almond meal (I couldn't make a drive to the city, so I omitted, plus my almond butter is "dryer" than PB)
  • 1/4 cup peanut butter (We used almond butter!)
  • 1/4 cup coconut oil
  • 1/4 cup cocoa powder
  • 2 packets of stevia 

You can then drop into candy molds (or silicon ice mold like we did.) 
Let harden in the fridge (or freezer if in a hurry, )
Pop out and enjoy. Remember to keep in the fridge or keep cool because they melt very quickly! 

Monday, January 6, 2014

Roasters Are for More Than Thanksgiving (Pt.1?)

Chicken quarters can go a LONG way. When they go on sale, a 10 pound bag for less than $5.00, I am SURE to grab one because I can bake it up and have several meals of shredded chicken in the freezer. (There are SO many recipes I use them in!) Usually, it will take me 2 or more pans to bake off all the chicken. I'll bake it, serve up a few pieces for dinner that night, then put the rest (minus the bones and skin!) in the freezer, portioned for a few more meals. Then I got a roaster.
Before I bought a roaster for Thanksgiving (to make cooking everything at the same time easier) I made myself promise it would get LOTS of use. Even though it was on sale, I wanted to be sure I could use it more than once a year.
So, I was really excited to see that the WHOLE bag of chicken quarters fits, bakes evenly and there's enough room that the skin browns and crisps nicely.

Plus it leaves the oven free for other things...like...I dunno... cookies!
I'm also looking into MORE uses for my roaster, if you know any- let me know in the comments! :)

Saturday, November 23, 2013

Make-Ahead Thanksgiving- Dishes That Freeze Well

You can save time in the kitchen this Thanksgiving by making some of your dishes ahead. And, if you have the room for them, even make them well in advance and freeze them.

These dishes freeze well, and you won't lose any texture or flavor:

  • Dressing/Stuffing
  • Sweet potatoes if they are mashed or in casserole form
  • Mashed potatoes if you use plenty of cream and butter
  • Corn casseroles
  • Squash casseroles
  • Yeast breads and rolls
  • Gravy 
  • Cookies
  • Fruit pies (not pumpkin)- assemble, but do not bake prior to freezing. Pies may be baked from frozen state (just add a bit of extra time.)
You may be tempted to freeze the kind of pies that you can buy in the supermarket frozen- but remember, those factory-made pies have added stabilizers to make them freeze-able. That's something the home-cook cannot replicate. 

To use, simply defrost in the refrigerator (except cookies and breads!) and warm in the oven. 

Saturday, October 26, 2013

The Easiest Mock Butterbeer Recipe Ever


We still love the Harry Potter franchise over here at the Disheveled household. And every Halloween we try new recipes of the delicious and magical foods found in the books and movies. This year, I wanted to develop a simple butterbeer, that can be doubled or tripled as needed, tasted yummy, and didn't require me going to the city to get butterscotch sauce. (Which was in the former easiest recipe I had found.) I worked out one that passed the picky Potterhead taste test, (x3), and to boot- if you use diet soda, can be carb-free!

Here it is...
so easy...

Mix together:

  • 2 12oz cans of cream soda (or diet cream soda)
  • 1/4 tsp imitation butter flavoring (we use Watkin's)
  • 2 drops of caramel flavoring
  • 1 1/2 teaspoons of heavy cream
Just mix it. Pour it. Drink it.
Makes about 4 servings. Two if they're huge.

Feel free to share with a link! Here's a Pinterest image :)

Wednesday, September 4, 2013

Shanah Tovah! Moist Honey Apple Cake


Our house LOVES this cake, not just for holidays, but pretty much all autumn and winter long. Not overly sweet, dry or spiced, this cake is a perfectly rounded honey cake with just enough apple-goodness.

Preheat your oven to 325 degrees and spray a NON STICK bundt pan with a release. I use an olive oil one with great results. (A non stick is very important because of all the honey in the batter.)

You will need:
  • 3 eggs
  • 1 cup of honey
  • 3/4 cup light brown sugar
  • 1 cup oil (a light oil)
  • 1 teaspoon of vanilla extract
  • 3 cups of flour (I use 2 AP, and one wheat- very delicious!)
  • 1 teaspoon baking powder
  • 1 teaspoon baking soda
  • 1/4 teaspoon salt 
  • 2 teaspoons cinnamon
  • 1/4 teaspoon nutmeg
  • pinch of ground ginger
  • 4-6 apples of choice, pealed and grated. (I zip them through the grater on my food processor. It makes them uniform, and doesn't give them time to brown.) You can use any apples you like, this isn't a pie where you need firm pieces, so if they cook down into the batter it doesn't hurt it.
and for the glaze:
  • 1 cup powdered sugar 
  • 1 tablespoon, or slightly less,  almond milk or your choice of dairy substitute. (or milk if you're not making it kosher!)
  • splash of vanilla extract
In a large mixing bowl beat your eggs until they are creamy-yellow and a bit foamy. Beat in your honey until fully incorporated. Then you can easily beat in your brown sugar, oil, and vanilla extract. 

Over the top of the mixture, SIFT the remaining DRY ingredients. Stir until mixed. Fold in your apples. Depending on the size of your apples, you will have about 4-5 cups of gratings. 


Spread the thick batter into your prepared bundt pan. Bake for around 70 minutes before checking. A skewer into the middle of the ring will come out clean, and the sides of the cake should shrink slightly away from the edges of the pan. It may take up to 90 minutes, this is a very moist cake.

Let cook in the pan for about 10 minutes to help with releasing without breakage. Then turn over onto a plate, platter or rack to continue to cool thoroughly. It make take a couple hours because of the density.


To make the glaze, mix your splash of vanilla and about 1/2 of a tablespoon of your milk/substitute. Incorporate as  much as you can before adding more liquid splash-by-splash until the right consistency. You'll want it pretty thick, about like honey. Drizzle onto the cake. You can just use a fork, or pipe it on with a bag. Let dry before cutting.

Tuesday, March 12, 2013

Easy and Cheesy Quinoa Bites

These are a tasty, and reasonably healthy, treat we whip up when we want a warm savory snack. I make a large batch of quinoa in the beginning of the week for lunches, and often we have it as a side dish- so I just grab some from the fridge (it makes great leftovers!) and pop these together.


Preheat your oven to 400, and spray a mini muffin pan with non-stick pray, or brush with the tiniest of olive oil.

In a bowl, mix together

  • 2 cups cooked and cooled quinoa (mine is often mixed white & red, yum!)
  • 1/4-3/4 cup shredded cheese. Any kind or mixed kinds. If it is strongly flavored, you may wish to use less. 
  • 1 beaten egg
  • a pinch of salt
  • pepper or other seasonings to taste. 
Use a cookie scoop, or spoons to divide the mixture evenly among the muffin cups. Don't pack tightly. 


Bake 12-18 minutes, or until golden and the edges just start to crisp. 

Monday, February 4, 2013

Whole Wheat Calzones

Delicious and gooey, while being both chewy and a bit crispy, what isn't to love about calzones. You can fill 'em all the same, or let each family member fill theirs with their favorite items. This recipe makes 4-6 calzones, depending on size.

In a mixing bowl combine 1 C or warm water, 1/2 tsp white sugar and 1 packet (or 2 1/4 tsp) yeast. You can use regular or quick-rise. (Quick-rise if you're HUNGRY ;-) ) Let sit for 5-15 minutes. (5 for quick rise, 10-15 for regular yeast.) It will get frothy.

Add in 1 tsp kosher salt, and 2 1/2 C wheat flour. (If you use this recipe with white flour, use 3 C, as the wheat soaks up more moisture.) Mix until smooth, then knead for 7-10 minutes until more elastic. Lightly oil a bowl with olive oil, and let the dough ball rise in it until doubled in size. (Time will depend on your yeast.)

Divide your dough into 4-6 pieces, and roll into balls. Let these rest for 15 mins will you get your fillings together. Fillings can include, (but get creative!) pizza sauce, cheese, pepperoni, sausage, peppers, onions, etc.

Preheat your oven to 500. Roll each ball thinly with a rolling pin, fill carefully on one side of the dough circle. Fold over the empty side of the dough circle, and crimp shut with your fingers or a fork. Poke the tops of each calzone with a fork once to let out some steam. Place all your calzones on a baking sheet (or 2), and brush with an egg-wash. (1 egg and 1T milk or water.) Bake until golden. (Time will depend on size, and your oven.)

I couldn't get super great pictures, the sun had already gone down and my kitchen lights are horrendous for pictures. But gooey cheese and crisp-chewy crust, YUM!

Monday, December 10, 2012

Tres Leches Cake


Tres Leches Cake is a delicious dessert that's simple enough for any meal, but rich enough for a holiday treat.

Preheat oven to 325. (300 for glass pans)
In a large bowl sift together:
  • 1 1/2 C cake flour
  • a pinch of salt
  • 1 tsp baking powder
In another bowl, mix thoroughly:
  • 1/3 cup oil
  • 1 C white sugar
  • 2 tsp vanilla extract
 Slowly beat in, one at a time 5 eggs. Be sure to mix in each egg before proceeding to the next one. When the mixture is fully incorporated, beat in 1/2 C whole milk. Gently, but completely fold in the flour mixture in 3-4 batches.

 Pour into a LIGHTLY sprayed 13x9 cake pan. Bake for 30-45 minutes, or until a toothpick inserted near the center comes out clean. Let cool in the pan for 15 minutes. Over-turn the cake onto a platter. Be sure the platter has a raised edge. Poke several times with a fork, skewer, or chopstick.
 Cover with plastic wrap and continue to chill in the refrigerator for another half-hour.

In a large measuring cup or small mixing bowl with a pour-spout, mix together:
  • 1 can evaporated milk
  • 1/2 C cream or half&half
  • 1 can sweetened condensed milk
Slowly pour the milk syrup mixture slowly and evenly over the cake. Cover again and let sit for at least 1 more hour. Occasionally, use a spoon to pour any dripped milk syrup back onto the cake.

In another bowl whip together a half-pint of whipping cream, 1 1/2 TBS of white sugar, and 1 tsp vanilla. Spread over the cake just before serving. Top each slice with a cherry.

Monday, October 22, 2012

Delicious and Easy Pumpkin Muffins

Autumn is in there air, and pumpkin is in everything! Yummo! Here's a quick and easy recipe I whipped up one day when I just couldn't find one that fit my craving.

Preheat oven to 375.
Just toss this all in a bowl:
Mix thoroughly, but do not over beat. Best done by hand, and quick with just a silicon spatula.

Divide among a 12-well muffin pan that has been lightly greased or lined with paper liners.
Bake for 16-20 minutes.


(Edit: Ooooooo...look at all these pumpkin recipes too!)

Monday, October 1, 2012

Lemon-Ginger Throat Soother

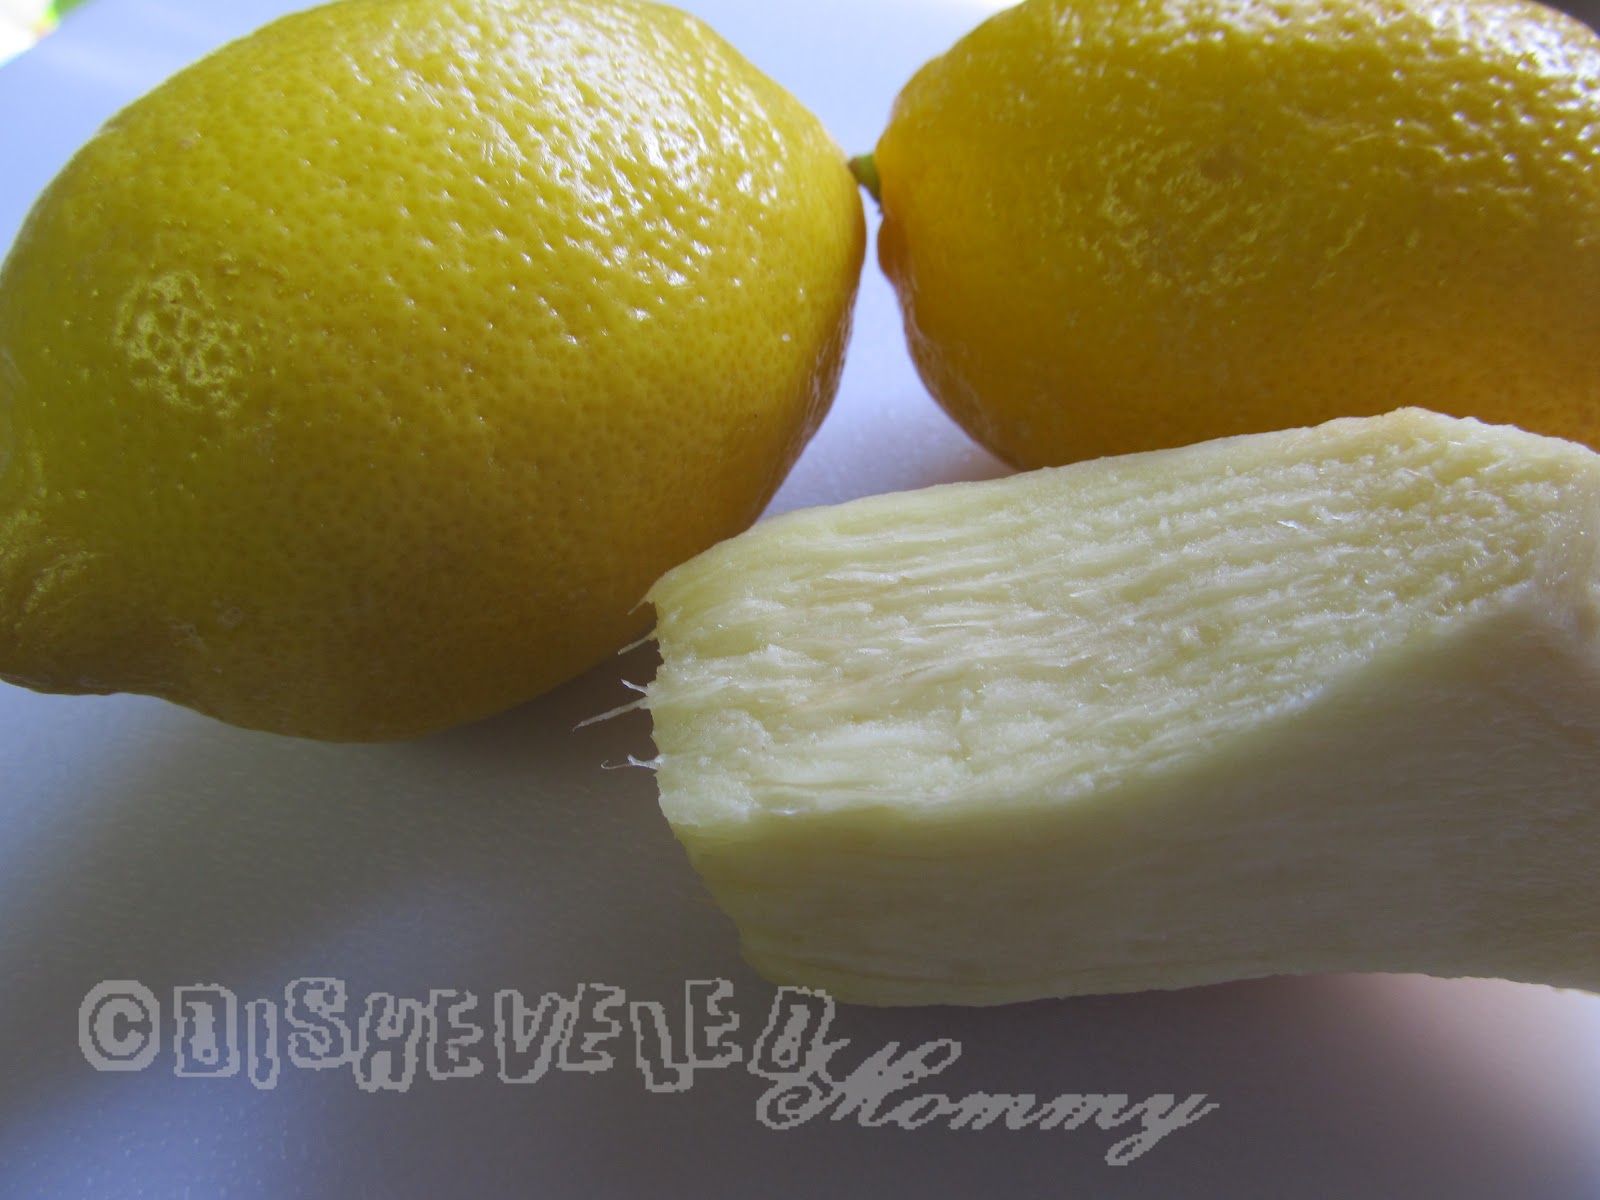
This weekend, I was SO glad to have a big jar of this on hand! Chuck-full of lemon and ginger, this honey concoction is great as tea, or an additive to teas in soothing Autumn and Winter throat ailments.


I made a big (family-sized) jar, so I needed 2 or 3 lemons, and about 3 inches of ginger. If you make a small bit, you'll need just one lemon, and just an inch of ginger.


Cut your lemons into fourths, then slice very thinly. Grate your ginger with a microplane grater.
Layer in your jar with honey.

Let sit in your fridge for at least four days.
To use, add a spoonful to a mug of hot water for a soothing tea, or add to hot tea to boost its soothing properties. 

Friday, August 17, 2012

Little One Errand Food: Part 2

Today we're heading into the city today, and decided to make our snack box within the themes of this week's school stuff. We are working on the letter G. (The Princess is so excited that her name has a big G AND a little g!) We also worked with the color green. Today's snack box is a G/green box.

We have:
  • a fruit salad with grapes, kiwi, and green apples.
  • goldfish crackers. (OK, so they're whales here...don't tell The Princess!)
  • her favorite- green olives.
  • and a granola bar.
  • and a spiffy green sword to eat it with!

Sunday, August 5, 2012

Quick Tip: Freezer Organization

Since we just have a small, above the fridge type freezer- and 5 people, I am forever working on ways to maximize our space. This also helps minimize our food budget! The key to keeping a freezer effective and efficient is organization.
One of my favorite findings is freezing items FLAT so they stack and fit nicely.
I also LOVE using baskets to keep things grouped together, AND to keep them from falling out on me.


Another tip that homemakers use for freezers of all sizes is inventorying them. I used to keep mine in my Home Binder, but it was sometimes hard to remember to cross off when I'd use something. So, I switched to posting my chart on the fridge. That seemed to work, except it fell a lot, got drawn on by little artists, was a dirt magnet, etc. Now I use an index card system. Simple to do, simple to read, and stays both handy for Mom and out of the way of grubby little snatchers.
It's super easy to meet YOUR needs. I use the following categories: beef, pork, chicken, veggies, other, desserts/juices (we hardly ever have either! lol), and ingredients/condiments/etc.

The meats are pretty self-explanatory.  I'll have some things that are cooked and portioned into family-sized servings (like ground beef), and some that are marinating. The card should tell me what's going on. Somethings are just popped into the freezer because I got them on the sell-by date and I hadn't time to fix them up. Since my charcoal steaks say nothing about them, I know I'll have to slice them up or something when I go to use them. 

"Other" has things like leftovers we like for lunches- but not the next day. Such as chili, curry, etc. Hot dogs also go here because we seldom have them, and they are often mixed meats. I have some catfish nuggets in the freezer right now, so that's there too.

Things like my cubes of tomato paste, cubes of grated ginger, and pork fat for rendering are in the "ingredients..." category. When I get butter on sale, it goes here too.

I go through a lot of "Veggies" cards. To simply it, I break some things like ears of corn into family-serving sizes. Other things I mark how much is left rather than cross the whole bag off.

It's all right there for me to make my menu plans/shopping lists with a magnetic clip. (4 for $1 in the dollar bins at Target.) Every once-in-a-while, when a card is full or too messy to read, I'll go through and re-write the unused items from it on a clean one. This week my "beef" card is nice and pretty! ;-)

Sunday, July 22, 2012

Six-Minute Chewy Caramels- Almost Turtles

Pinterest is all a flutter with microwave-cooked caramel recipes. When I think of chewy, gooey caramel I think of turtles, nothing is better with caramel than crunchy pecans. So I thought I'd give this caramel a chance, and whipped out some molds to experiment with. Here's what you'll need to make the caramel:
  • 1/2 C sugar
  • 1/2 C FIRMLY packed brown sugar
  • 1/2 C light corn syrup
  • 1/2 C sweetened condensed milk (NOT a whole can! ;-) )
  • 1/4 C (half a stick) real butter, cut into pieces
  • 1 tsp vanilla
 You'll also want a microwaveable bowl (I suggest glass, this mixture gets HOT.) You'll want it to hold at least 2 qts because the caramel will bubble up a lot. A silicone spatula is handy for stirring because it handles heat well, scrapes well, and cleans off easily. If making "Almost Turtles", you'll also need some finely chopped pecans, and chocolate to dip if you wish. (I did some with and without chocolate.)

You may pour the mixture into a prepared pan, then cut when set- or you may want to use molds. Either way you'll need to prepare your pan or molds a head of time with some non-stick spray. (Lining a pan with foil may also be helpful as well.) I also tried to put some pecans IN my molds first, but the caramel surrounded them- nice for having them in the middle- but you'll need to press some on top if you want them to look that way.)

Now, you can get your mixture cooking without being too distracted. Just dump everything in a bowl and mix.
Pop in your microwave and cook on high power for six to seven minutes, depending on your microwaves power. Stir every two or three minutes. You'll know when it's done when it is homogeneous and no longer grainy. And, well, caramel-y. =-)

Let sit for several minutes before pouring into your mold(s). You may want some toothpicks on hand to pop the little bubbles.

Let set in the fridge or freezer until set, then cut or unmold.

You can now cover some, or all, or dip, some in chocolate!

Wrap each piece in waxed paper to store. These are gooey!