Tres Leches Cake

Delicious for any occasion

Homemade Watercolors

For homeschoolers, or just fun at home

DIY Toothpaste

Great for good health, and a happy pocketbook

Vegetarian Meals for the Whole Family

Even picky kids will love these meat-less dishes

Sewing Projects and Tips

Even more tutorials to come soon

Showing posts with label Tutorials. Show all posts

Monday, August 6, 2012

How I Make My Pillowcase Dresses

There are probably 1001 ways to make pillowcase dresses, and everyone has their favorite. This is the way I make mine for several reasons:
  • -I like the way it looks.
  • -Sometimes I don't have matching ribbon or want the straps to be from the same fabric- this is adaptable for it.
  • -I can also use bias tape for the straps.
  • -The straps can be tied to fit a growing child, you're not limited to the size it's first made like the dresses that use the ribbon to gather AND become straps. (I always worry about those getting tangled around the neck as well.) So it can be worn for many years- even as a shirt much later!

(click any pic to see larger)

First, find a spiffy pillowcase. I also use rectangles of fabric that I like. Measure how long you'll want the dress, and mark. Here's a tip for active little ones- also have them bend over when you're holding the pillowcase up to them so check length. Check and be SURE the finished dress will cover little panties! Adjust as needed. I chopped off quite a bit of this case for my four-year-old.
Now, turn inside-out and fold in half. I like to do it inside-out so I can mark my line with whatever I can find. ;-) Make a mark TWO inches from the edge. (NOT the folded edge, the one where both sides meet.) Make one FOUR inches down. Connect these marks with a J-shaped line. Cut out. This arm-hole size will fit any size because you'll adjust with the ties/straps.
Now, we'll start to iron and hem up that top. Fold down one of the layers about 1/4 inch. Press.
Fold down about an inch (you can get away with a little less if using thinner elastic, but I like how an inch looks.) Press again.
Repeat for the other side.
Now that you have nice and tidy edges, sew the top to hold the elastic. Use the left side of your foot to keep it lined up.
This'll keep your line neat and straight. Don't forget to back-stitch a couple stitches in the beginning and the end to keep your work from coming undone. Don't mind the excess on the edges, they'll be covered in just a bit. (Let's also pretend like I used dark thread to show you the stitching...I actually ran out of everything else and wanted to finish the project!)
Next, insert and sew in some elastic (3/4 inch seems just perfect) using this method here. Six to seven inches will work fine. Just enough to make that gathered top, and cover chests. No worries if your securely attaching is a little messy, it will be covered up.
  Now- here is where you will adapt from my basic way if using thinner ribbon for ties that will need to be threaded into the arms. (My other ways finish the arm-hole edges without hemming them.) You'll want to turn in, and press a half-inch hem. Fold down about a quarter inch on the ends so they will get tucked in as you sew it into a casing. Sew each arm so that it become a tube (attached to the dress) with two open ends. Then you thread the ribbons in, about a yard each, fray-check the edges and you're done.

Using bias tape is about the same as making straps from the case's fabric, with the exception of sewing the straps together.Here is how I make my straps:

Take the extra bit you cut off, cut off one of the side (short end) seams (often there is only one!) and the top seam. Cut in half lengthwise.
 Fold lengthwise, and sew into a loooooong tube. Leave one end open for turning right-side out. I like to taper my ends like so:
I back-stitch when I turn a corner for a little extra insurance. Then I trim a bit before I turn right-side out.

You can either sew shut the open end after turning, or use a bit of stitch-witchery.
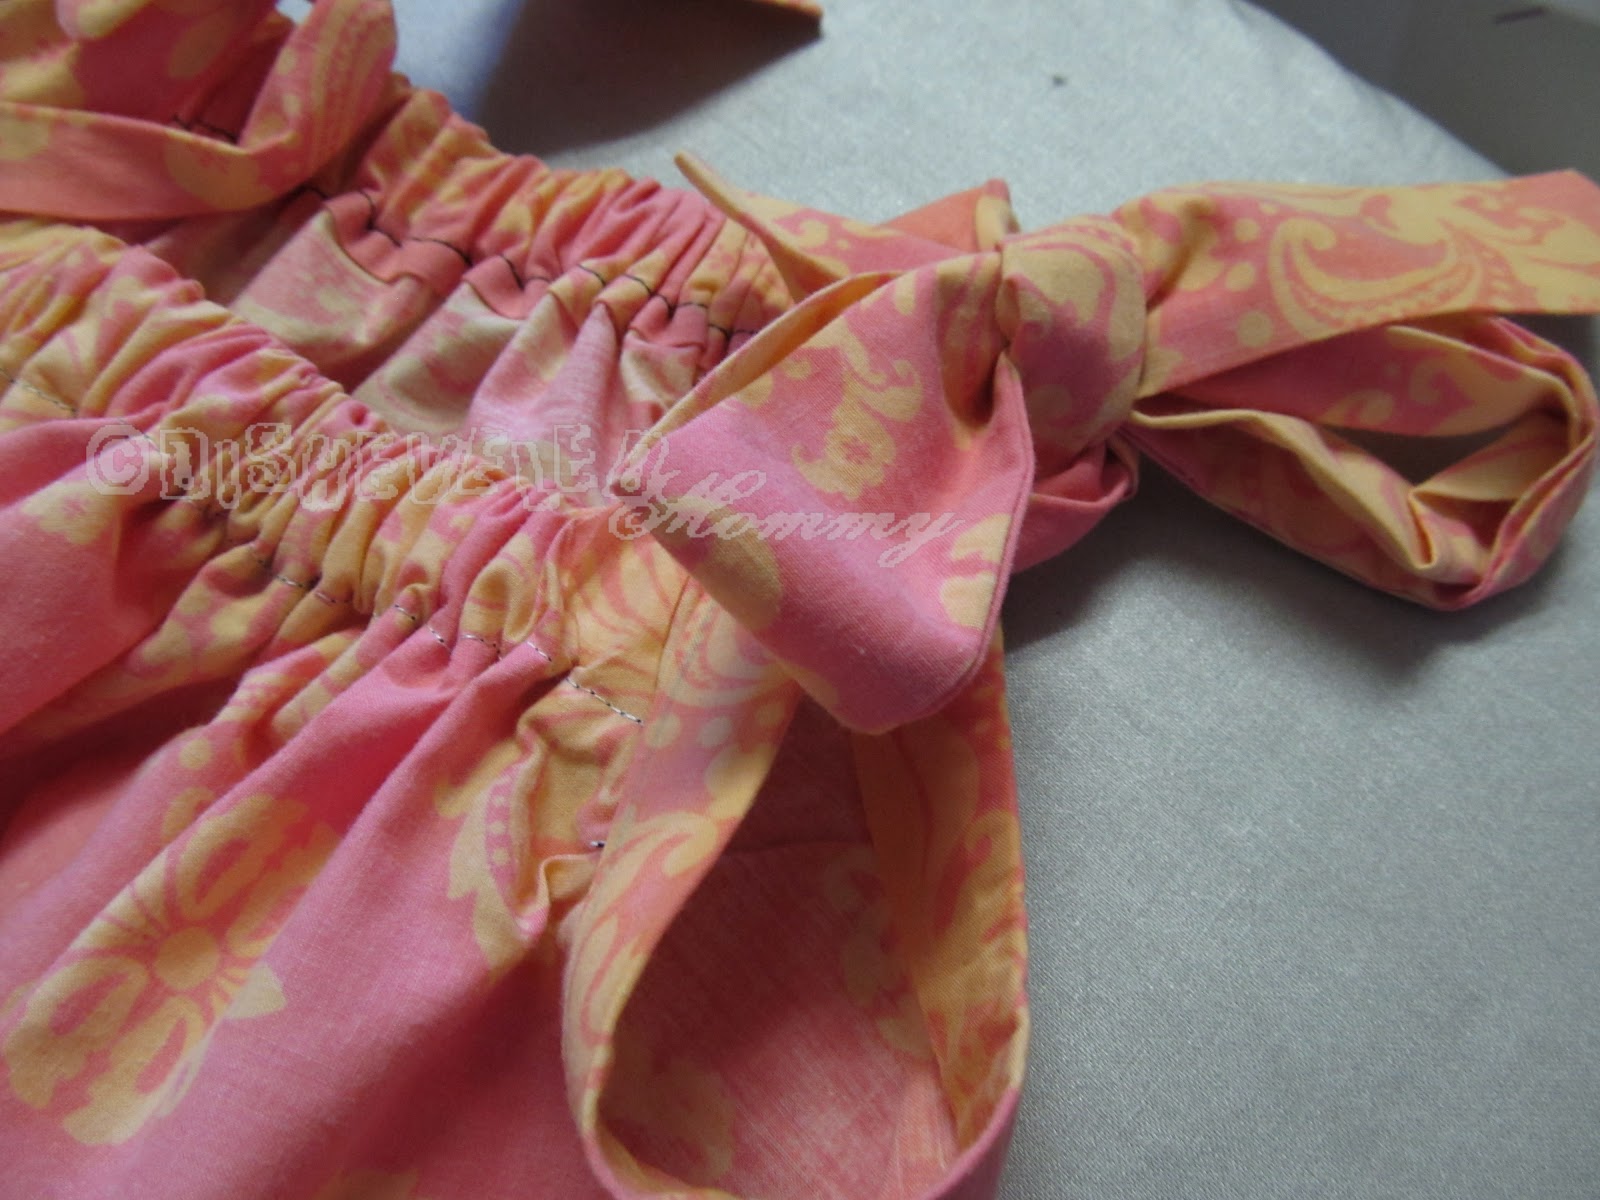
Attaching the straps is made MUCH easier if you crease/press the middle of the straps the length of the arm-holes in half. Line up the center of the strap with the center seam of the arms, folding over the rough edge of them. This is also how you'd attach bias tape straps! Sew them from top edge to top edge, and voila! (Here I used some stitch-witchery too, my thread was TOO dark for these nice finished edges, but I may go back and stitch them up as well.)
I LOVE the way the fabric straps/ties look.


Tuesday, July 31, 2012

Cute Gathered Sleeves Make an Over-sized T-shirt Better- A How-To

The Princess earned a t-shirt during the summer reading program this year. She LOVES her shirt, but gets annoyed at how the too-big-for-her shirt hangs. So, I decided to fit it too her to make her happy, and so she wouldn't look pants-less during the parade she was going to walk in with the library!

Most of it is just cutting down and stitching back up, but we went for cuter, girlie-er sleeves.
Here's how to do it:

First, wearing the shirt inside out, (either you or the owner of the shirt...), mark where you will need to take it in and how far to shorten it. Take it off and pin up the sides nice and straight for sewing up. I also chopped off the arms, and marked where new ones would go. Sew up until the armholes on both sides. Loose the picture you took for your blog, and move on to the arms.

Make a pattern with paper half the diameter of the arm holes, a rounded edge, and a scant inch lip on the straight edge. Like this:
Use the original arms you cut off to cut out two new arms.

With right-sides together, pin the center of the new sleeve to the center seam of the t-shirt. (Straight edges together too!)


Start pinning and gathering the sleeves. The small straight edges will need to go against the straight edge of the t-shirt.

Sew it together, and enjoy it's adorableness.
You may also want to try the shirt on again, and hand-sew to adjust the way the sleeves lay in the profile view. (A) hasn't been fine tuned yet, and (B) has been tacked a bit:

[We also lost the collar, and added ribbons ;-) ]

Sunday, May 20, 2012

Don't Fight With Elastic!

One of the things that frustrates me when sewing quick little girls' dresses and skirts is sewing in the elastic. Pulling it to get it in the right place, it slipping, over and over...BUT I just learned this super cool way to get your waistbands in without tugging and cursing!

First, unwind, BUT DON'T CUT, your elastic, mark the length you need.
Thread through your fabric as usual. Sew the end to secure.
Then, push the other end of the fabric back to the mark you made.
Now you can easily sew this side to secure too, without cursing. No stretching and pulling a small bit of elastic to fit!
Perfectly gathered.

Sunday, December 11, 2011

Holidays on a Budget: Holiday Card Holder

Here is a simple wreath for displaying your holiday cards. You only need a few items to make it, and it makes a great busy project for an older kid.

Begin with cutting an eleven-inch circle from some sturdy cardboard. You will also need a five-inch hole out of the center.
 

Next, cover this in some wrapping paper. Be sure to cut slits or notches in around the edges of the paper so it will cover the curves nicely.

Next, you can paint your clothespins, or cover them with the same paper. A coordinating paper would be nice too. To cover the pins cleanly, apply your glue, and press to the backside of your paper. You'll want to use a piece of paper bigger than your clothespins, and let them dry thoroughly before trimming the paper down. You can also coat with some Modge-Podge or similar coating for protection.
 Arrange your 12 clothespins around your wreath. Secure with hot glue. You can also add some ribbon to the center to make it more wreath-like. (We did...) By the time your pins are filled with cards around the outer edge, the ribbon in the middle will be a nice touch.

Saturday, December 10, 2011

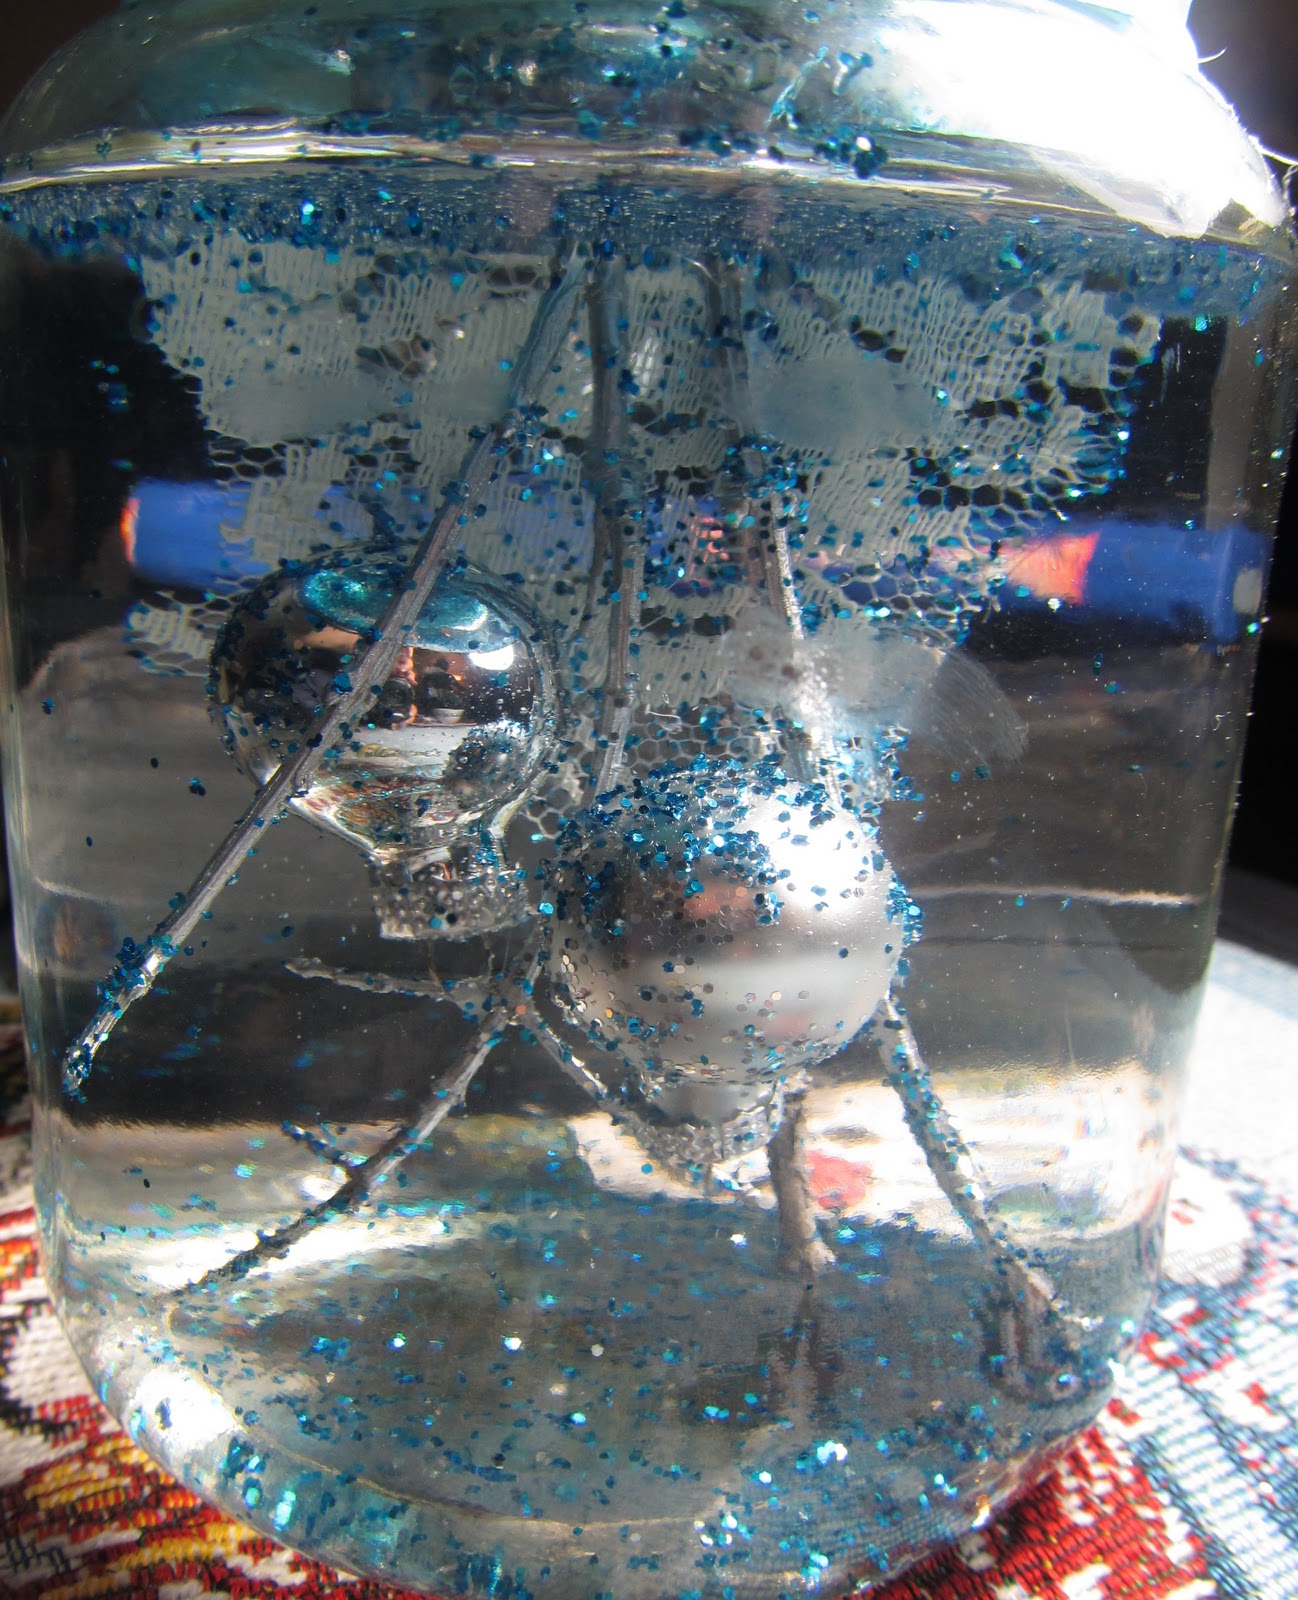
Holidays on a Budget: Bauble Snow-Globes (Anthro-Inspired)

Silver-filled artsy snow-globes are all the rage this year. Simple but blingy, and can be used year-round. Ours don't feature jewelry, but instead good-quality silver spray paint gives trinkets a quirky touch.

First, you'll want to find a jar to use, size and shape is completely up to you. Just be sure to wash thoroughly and remove all traces of label. Don't forget the lid! I also spray painted the inside of the lid- but it was a waste of time, you cannot see it!

Gather your goodies. I saw some globes that had a bit of lace in them, so cute! I sprayed my lace with some clear coat to keep it stiff and in place under the water.I also used some mini-balls, a painted marble, a painted chess piece, and some painted twigs.
Start arranging your baubles on the inside of your lid. I used hot glue. Be sure to secure the bottoms and the tops of your balls so they stay in place when you add them to the jar. Especially the ones you "hang" from the twigs.

Fill your jar almost all the way with water, add a couple drops of glycerine, (optional, but it is supposed to make your glitter float better...) and your glitter of choice. Carefully lower your goodie-covered lid onto the jar. Glue with a waterproof glue before you screw it all the way on. Let cure. (I used a Goop-brand glue)

They even look cute upside down!
You can also cover the lid with some ribbon, it looks super-cute!
One thing is for sure, I need practice photographing them, but they are beautiful in real-life!

Sunday, November 13, 2011

Craft Tutorial: T-shirt Infinity Scarf

Infinity scarfs are cute, versatile, and easily adapted to wear the ways you like. Even as a necklace! Here's how to throw one together, I made one for myself from one of Hubby's old torn up shirts, as well as one for The Princess from one of big brother's shirts WHILE I made dinner.

First grab your shirt. I totally didn't think about picture taking until I was a bit through the process, but you know what it looks like to grab a shirt. =-D You will want a soft t-shirt WITHOUT seams on the sides. It doesn't have to be a thick one either, thin under-shirts work just as well, as long as they have seam-less sides.

You are going to want to cut off the hem of the shirt, then chop it off about where the sleeves meet the trunk. The one I used from Hubby has a big hole that went a little below that, but cutting it that inch or so shorter didn't seem to matter.

Then, you are going to want to cut slits, going around the shirt horizontally, across your belly if you were wearing it. BUT leave a 1/2-3/4 inch space of material. Like this:


Now, you want to hold that nice, uncut, sturdy bit in your hand and grab the looped strands with the other hand. Slowly, but firmly stretch the strands until they curl up into themselves. They will start to look quite lovely.

Now, we're going to want to do something about that sturdy bit holding it together. Get a needle and a fair amount of thread. If you have cheap needles and/or already tender fingertips, grab some pliers too- it helps with the layers! I was lazy, and used the dark thread that was already out, but it was ok because it wasn't seen by the end.

You're going to want to weave your needle in and out and do a rough running-stitch through the length of the uncut portion. Neatness doesn't matter, you're just wanting to tack this all together, and gather it up.
Pull and gather it all up. Turn your needle about and go through again, from the opposite side, then again from the first side for good measure.
I also ran the thread around my bunch before I tied it off.
These are all the same shirt...just sucky lighting


Next, take a scrap of your shirt, and cut off a 1 inch x 1 1/2-2 inch rectangle. Neatness doesn't matter. Length doesn't matter much, because you won't need it all, but that extra bit makes it easier to hold while you get it attached. You'll cut the extra off. Stretch this rectangle a bit to get it to start to curl, it will help it look tidier. Stitch it to your bunched up part to cover it, much like a bow.
Ignore the flower you see peeking out until the next step ;-)
This one is left plain

You can leave it like this, use it as a spot to add a broach, or other bit of decoration, or you can make and sew on a super-cute flower like this: 

Take some of your t-shirt, and draw/cut out some simple flower shapes. I folder my material over so I had two of each size, small, medium, and large. I also cut out one tiny set of petals.
Next, you need to stack them all up, largest on the bottom. You can also give these a tiny bit of stretch to make them curl a bit.
Tack them together with a tiny X, but before tying off your thread, add a lovely little bead. Mine is nothing fancy, it is from a pack I found in the dollar bin at Dollar General. I also found it easier to STILL not tie-off and just sew the flower to the scarf now.


Monday, April 4, 2011

Kinda Tutorial: Mini/Play Oven Mitts

Here is a method, disguised as a tutorial, on how I threw together my little one's play oven mitts that will go with her new play kitchen she'll get for her birthday soon. That is one long sentence.

First, you'll want some fabric. Either enough of one color/pattern for your mitt, or mitts, or two coordinating fabrics. I used old baby clothes of hers. (I also turned her old favorite dresses into an apron, but that's another post...) You only need a bit, toddlers and pre-preschoolers are known for their awfully tiny hands. ;-)

I did an outline of her little hand, and added about an inch-ish all around to get a pattern to trace. I slip-stitched, so I needed very little seam allowance, but you may need to add an extra 1/4 inch if sewing by machine. I can also try to make a printable pattern if you all would like...


You'll want to trace on the wrong-side of the fabric, and be sure to flip the pattern over for the opposite hand. (If making a pair.) Match the pieces right-sides together. Hem the bottom edges if needed. I cut mine out against the hem of the shirts I used. Lazy never looked so lovely.


You're going to want to add a little loop for hanging (just like real mitts...) I used the straps off one of my shirts (that I cut the mitts out of...) for one, and bits of ruffled collar off an other for a second pair. You can used almost anything, ribbon, a bit of bias tape, hemmed scraps, etc...
You'll want to place you loop between your layers like so:
Pin or baste in place.  (The lighting is wacky because I did this at night...lol)

Sew around, leaving the bottom open. (Hey, sometimes we need little reminders- MOMMY BRAINS!)

Turn right-side out and smooth the rounds on the inside with a chopstick.
I also made matching mini tea towels by sewing the edging off the cuffs of the shirts I used to some CHEAPY white washcloths. The kind that are about 18 for $3 and scrub so awesomely. You can also use ribbon, lace, bias tape, etc here as well, but the edges I cut off just fit perfectly and matched! I did the top & bottom of the washcloth. I may make some more when she's a bit older & more sophisticated, adding a bit of embroidery. =-)