Tres Leches Cake

Delicious for any occasion

Homemade Watercolors

For homeschoolers, or just fun at home

DIY Toothpaste

Great for good health, and a happy pocketbook

Vegetarian Meals for the Whole Family

Even picky kids will love these meat-less dishes

Sewing Projects and Tips

Even more tutorials to come soon

Showing posts with label Home Decor. Show all posts

Tuesday, May 8, 2012

Quick Tip: Keep Dirt in Hanging Planters

You can easily keep dirt in most hanging planters with one simple, cheap, kitchen item.

A coffee filter in the bottom will keep dirt where it belongs!


Saturday, December 10, 2011

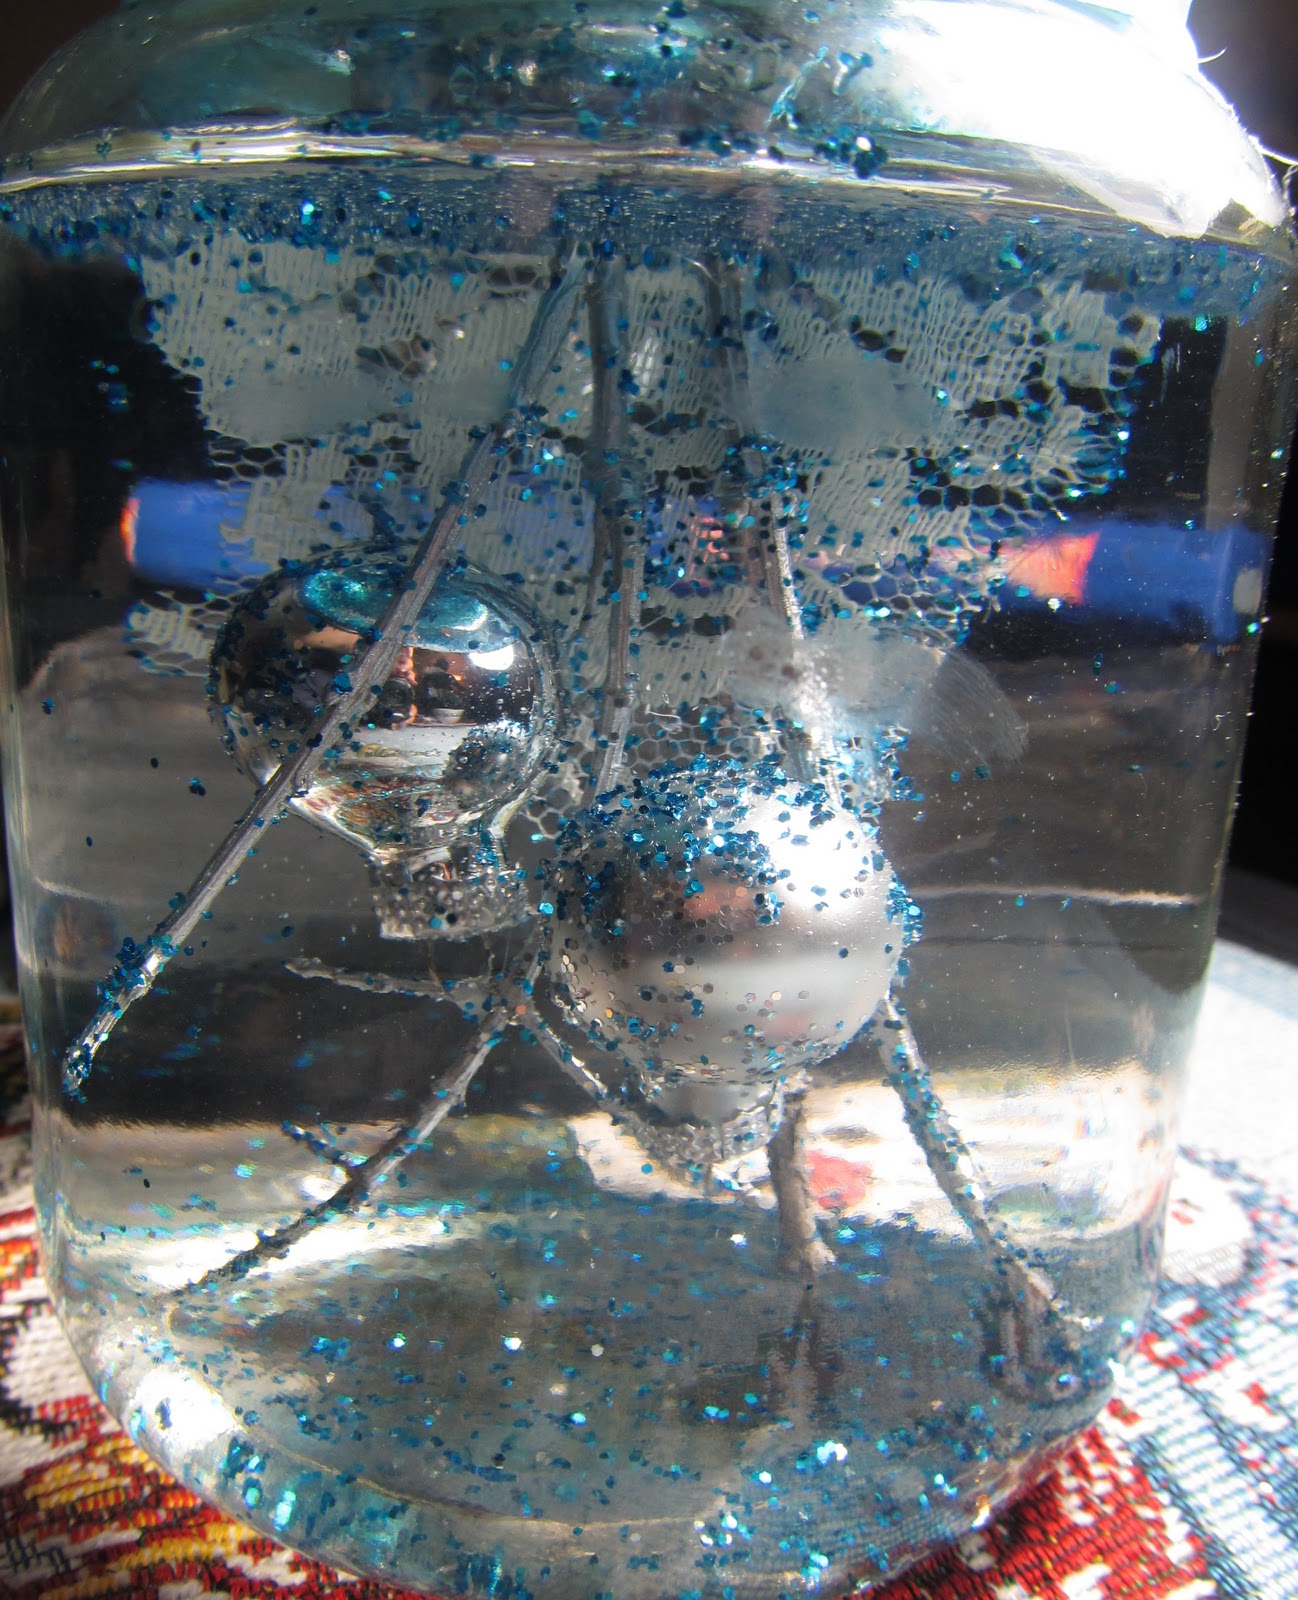
Holidays on a Budget: Bauble Snow-Globes (Anthro-Inspired)

Silver-filled artsy snow-globes are all the rage this year. Simple but blingy, and can be used year-round. Ours don't feature jewelry, but instead good-quality silver spray paint gives trinkets a quirky touch.

First, you'll want to find a jar to use, size and shape is completely up to you. Just be sure to wash thoroughly and remove all traces of label. Don't forget the lid! I also spray painted the inside of the lid- but it was a waste of time, you cannot see it!

Gather your goodies. I saw some globes that had a bit of lace in them, so cute! I sprayed my lace with some clear coat to keep it stiff and in place under the water.I also used some mini-balls, a painted marble, a painted chess piece, and some painted twigs.
Start arranging your baubles on the inside of your lid. I used hot glue. Be sure to secure the bottoms and the tops of your balls so they stay in place when you add them to the jar. Especially the ones you "hang" from the twigs.

Fill your jar almost all the way with water, add a couple drops of glycerine, (optional, but it is supposed to make your glitter float better...) and your glitter of choice. Carefully lower your goodie-covered lid onto the jar. Glue with a waterproof glue before you screw it all the way on. Let cure. (I used a Goop-brand glue)

They even look cute upside down!
You can also cover the lid with some ribbon, it looks super-cute!
One thing is for sure, I need practice photographing them, but they are beautiful in real-life!

Tuesday, December 6, 2011

Holidays on a Budget: DIY Plastic Wreaths

Looking for an easy, but time consuming craft to keep the kids busy? Or maybe just one that's durable? Then grab a wire clothes hanger, a couple of white trash bags and some scissors.

Bend (or is it unbend?) your hanger into a circle. Some people like to leave the hook on for hanging, but I clip that sucker off. I also covered the part where I twisted it back together with a little tape so no one would get scratched. I also totally forgot to take a picture of this.

Next, fold your trash bag(s) in half lengthwise until you have a controllable width to cut. Cut into inch-ish sections.
That paint in my thumbnail will just NOT go away!


Then, cut each strip into pieces about six inches long. (I got 8 with each strip.)
Now we'll tie our strips to our wire form. A billion hitch knots... I believe this one is called a Cow Hitch. I'm not sure exactly what words can describe this best, so yay pictures!
Make a U shape, lay under the wire. (You can do this holding it, but I can't hold it and take pictures.)
 Bring your tails up over the wire, and through the loop.
Pull taught, and repeat. Fill your form.
Add some decorations, (yay hot glue!) and you're done. Simple for all your kiddos to do, but will keep them ridiculously busy all afternoon. Lovely.
I'm thinking about trying it with a green cheapy vinyl tablecloth for a green one!

Monday, December 5, 2011

Holidays on a Budget: Two Easy Bows

Here are my two go-to bows for decorating everything from hair accessories, to wreaths, to just for hanging on the wall.

First, grab some ribbon, wired or unwired (but wired is easier for your first few...), about 4 times as long as you wish your bow to be. Fold it into fourths to mark  or you can eyeball it, and trim the ends up later. Lay your ribbon top-side-down, there should be 3 marks, splitting your ribbon in fourths. Fold the two on the ends to the middle. Glue with a tiny amount of glue. Tacky glue, or if you're very light handed, a glue gun works best.

 When you turn it over, it should look like this...

Flip it back over and adjust your tails.

Holding your bow lengthwise, fold the edges to meet in the center-back. 

Then back forward, gathering the center. Pinch and sparingly glue in place. 
 Take a couple inches of your ribbon and fold the edges in to meet in the middle.
 Use this to cover the center of the bow. (Propping up on your glue gun is optional...)

To make an easy double bow, grab some ribbon, and fold into thirds- but not evenly. The top bow will be the smallest, using the ribbon in the middle, then a bigger bow an inch or so bigger, then the ends will be about the same as the first bow. I'm sure there is some sort of math for figuring out how much ribbon you'll need for what size bow, but this isn't the place to go if you want math. I just eyeball it.

Repeat the fold-to-the-middle like with the bow above, but repeat!

 Pinch and wrap the middle, puff your bow, and there you go!

Sunday, December 4, 2011

Holidays on a Budget: Children's Clay Menorah

Your children will love this craft project. They get to play with dough, and have their own little menorah that uses inexpensive birthday candles.

First, you'll want to make some salt dough. (Equal part salt and flour, slowly add boiling water until it is the right consistency. Knead until smooth.) We knew ours was going to be blue, so we tinted our dough so we wouldn't have to use as many coats of paint. Totally optional.

Grab a half-mommy-sized handful, or a kiddo-sized handful of dough. Tear off about a thumb-sized piece and roll into a smooth ball. Press your ball into a stone-like shape. Set aside.

Take the rest of your dough and roll into a smooth snake, about six to eight inches long. We rounded our edges.
Carefully attach your stone shape to the middle. Then start laying out your holes. We started with the middle, then evenly spaced them working our way out. I marked the holes with a skewer, then widened them perfectly with a candle. (One in the center for the shamash, and four on each side.)


Let dry several days. We tried speeding it up with a low oven, but these pieces are so thick that they crack a little, use discretion.

Paint your little menorahs, and enjoy! I thought they looked a little like stone, very nice!

Saturday, December 3, 2011

Holidays on a Budget: Cinnamon Votives

I think I may be a little cinnamon-crazy this year. =-)


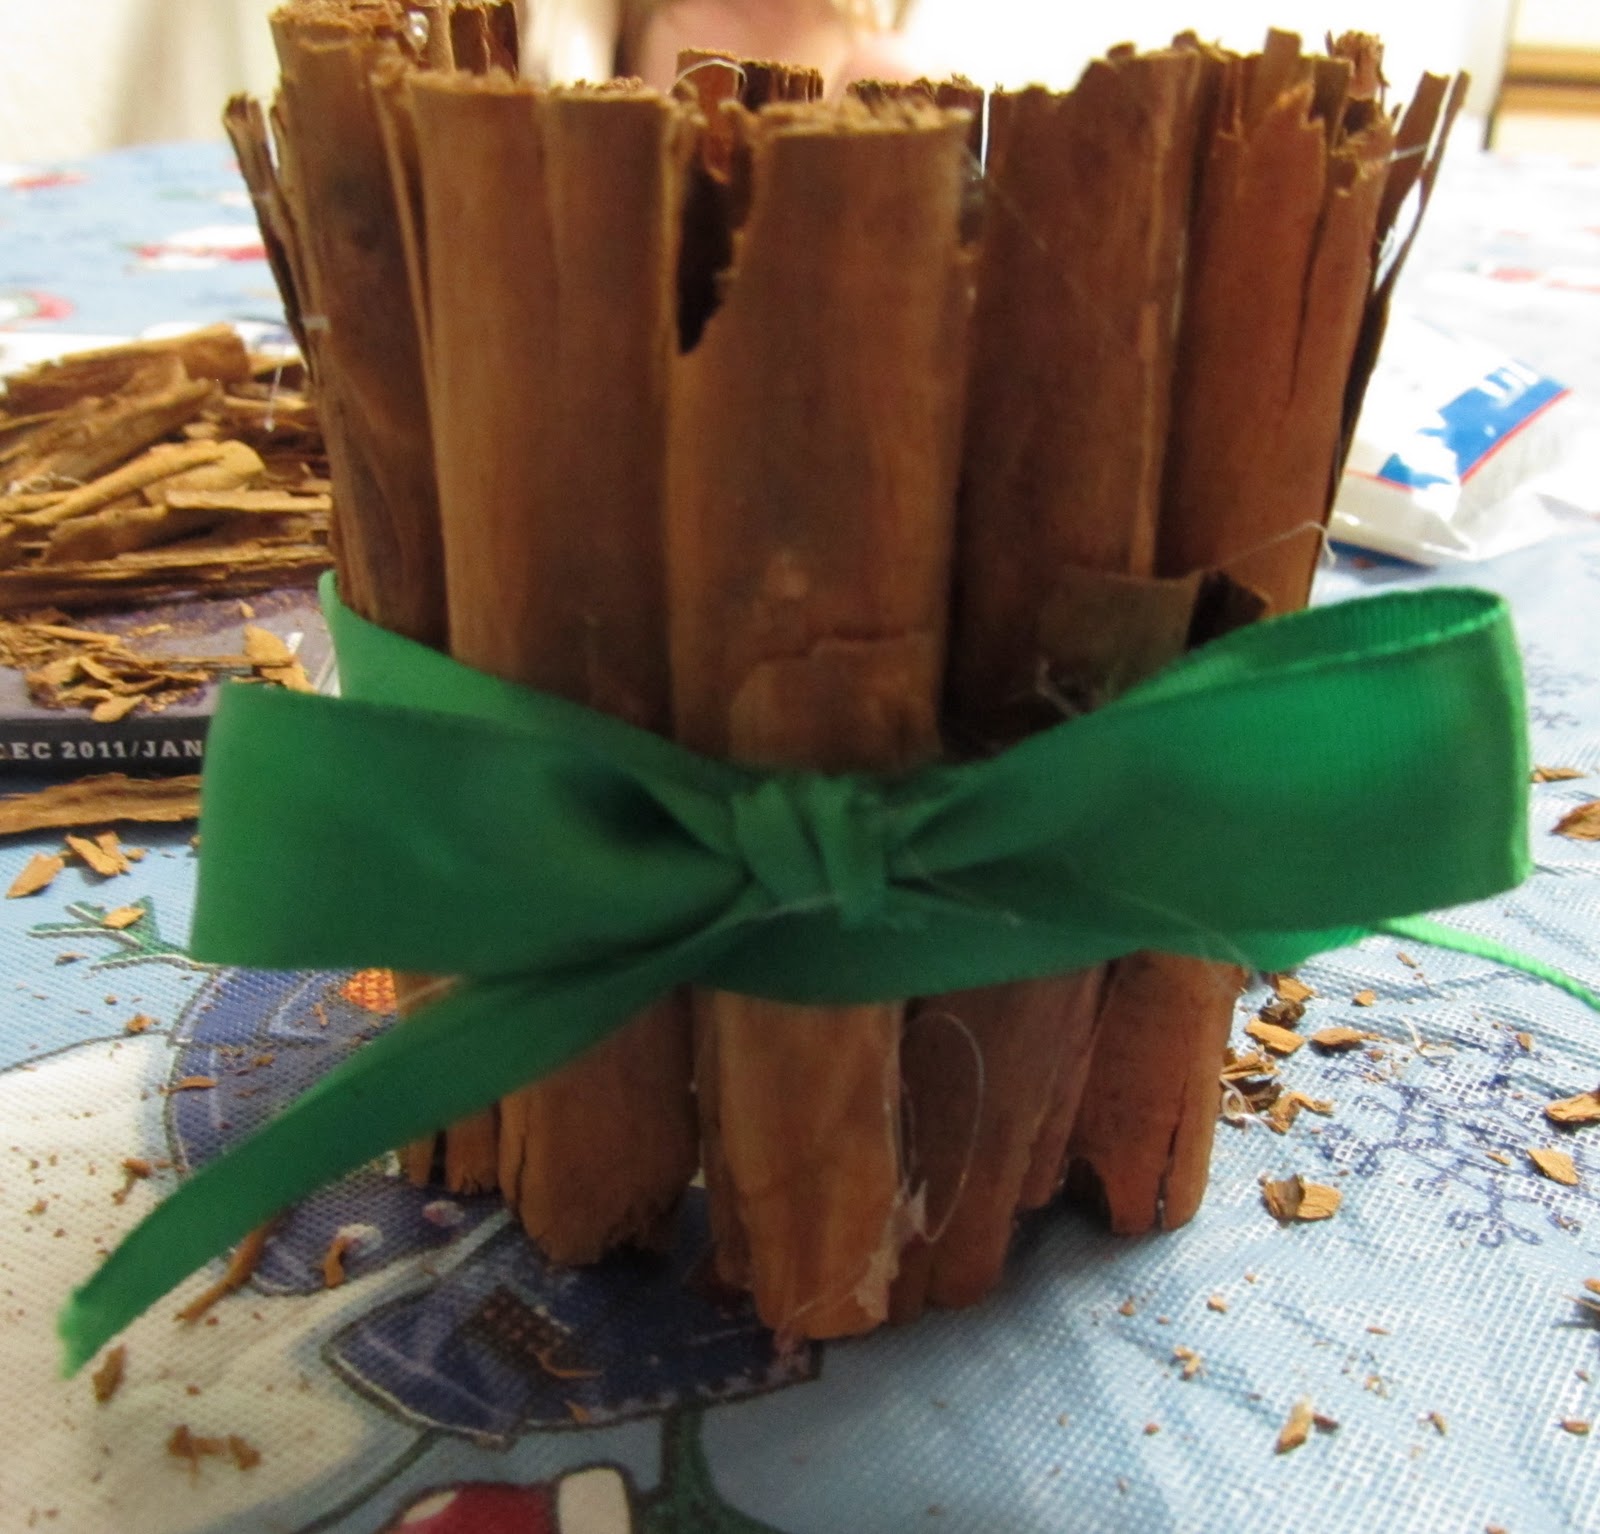
I've seen all sorts of stick-covered vases around the blog-world lately. Also little twig-covered votive holders. SO CUTE. But why not do that with cinnamon sticks? They're cheap if you grab a bag from the right section in the store. I got mine from the section with Mexican foods & spices, Tampico brand, but there are many brands. They were almost a dollar each, not too shabby. I grabbed two, but then I decided to cut my sticks in half so they'd lay flatter and release a lot of scent. So I ended up using one bag. Hmmmm...what to do with the other? (Cocoa?)

I gathered my supplies first so I wouldn't be running around with the hot glue gun plugged in. I had an audience, I didn't want curious hands to be tempted.
First, I trimmed the sticks to the right height with a small serrated knife. Hold firmly with your thumb, those suckers want to splinter. Save your splinters and ends to fill in any gaps.

I found the best way to halve the sticks was to slowly stab and prod down the length of them. On a magazine to protect your table, of course....


You don't have to halve them, but I liked the way they fitted. Plus it made my kitchen smell fantastic....

Start gluing and placing...

Oh no, a gap....

Gap?


If you get a little extra hanging on the bottom....or leave a lot to take a picture to show extra hanging on the bottom.... kitchen shears make easy work of trimming it.

Add a little ribbon, and clean up the extra glue....

Oops! missed some glue!

Friday, December 2, 2011

Holidays on a Budget: EASY Cardboard Snowflakes

Cutting toilette paper tubes into rings is a quick and simple way for kids of all ages to whip up some quilling-like snowflakes for wall art or tree decoration. The finished product can be as simple, or as elaborate as you want.


Little ones can easily glue together some six-ringed flakes that are cute-as-a-button.

Try cutting the rings in half and bending them to make more interesting designs.

Glue them to the spaces between....

A little paint, maybe some glitter...and voila!

Thursday, December 1, 2011

Holidays on a Budget: Cinnamon Ornaments

Cinnamon ornaments are a classic Christmas activity. We've all made them in school, and I love making them at home. They fill the whole house with a seasonal scent even while kids are rolling and cutting out their precious works of art. If you use an oven to dry them out, even better!

To make the dough, start with a hefty amount of cinnamon. The 2 for $1.00 jars work great ;-)
Mix in spoonfuls of apple sauce until the dough is smooth, and thick enough to hold its shape. It should be a but firmer than cookie dough, kind of like pie dough.


Roll your dough out to 1/4 inch thick, and cut with cookie cutters.
Some helpful tips:
  • Dust with cinnamon to roll out, especially if a little sticky. Flour will lighten your ornaments/leave weird spots.
  • Lay down as many cutters as you can/will fit. Then use a spatula to help you transfer them to a cookie sheet to dry. This helps them keep their shape. 

  • Too thick and they will take years to dry, too thin and they'll break like nothing. 1/4 inch seems to be just right. 
  • You can dry in a VERY mild oven (lowest setting, or until your oven on light pops on), or air dry for a couple days.
  • If poking a hole in the top to hang, remember to do it before they start to dry! 
  • Even though gingerpeople are the common shape for these because of their color and scent, other shapes are super cute too. We like stars too.
 Let dry in the manner you prefer. Turn as needed, but try not to handle TOO much.
Decorate with white puffy paint "icing".

 We like to glue our hangers on the back, rather than a ribbon through a hole. Both wire hangers and ribbons work nicely.